Supplies!
The paper flower book is coming out next week (Utter and Rampant Nonsense folks will get as part of their membership, it will be on payhip for anyone else)! I wanted to give you a supply list so you can have everything ready for when it comes out.
Explanations first, then links at the end if you want exactly what I used (though I emphasize that you absolutely do not need to have the same stuff as me, feel free to use what you have).
Tools & Supplies
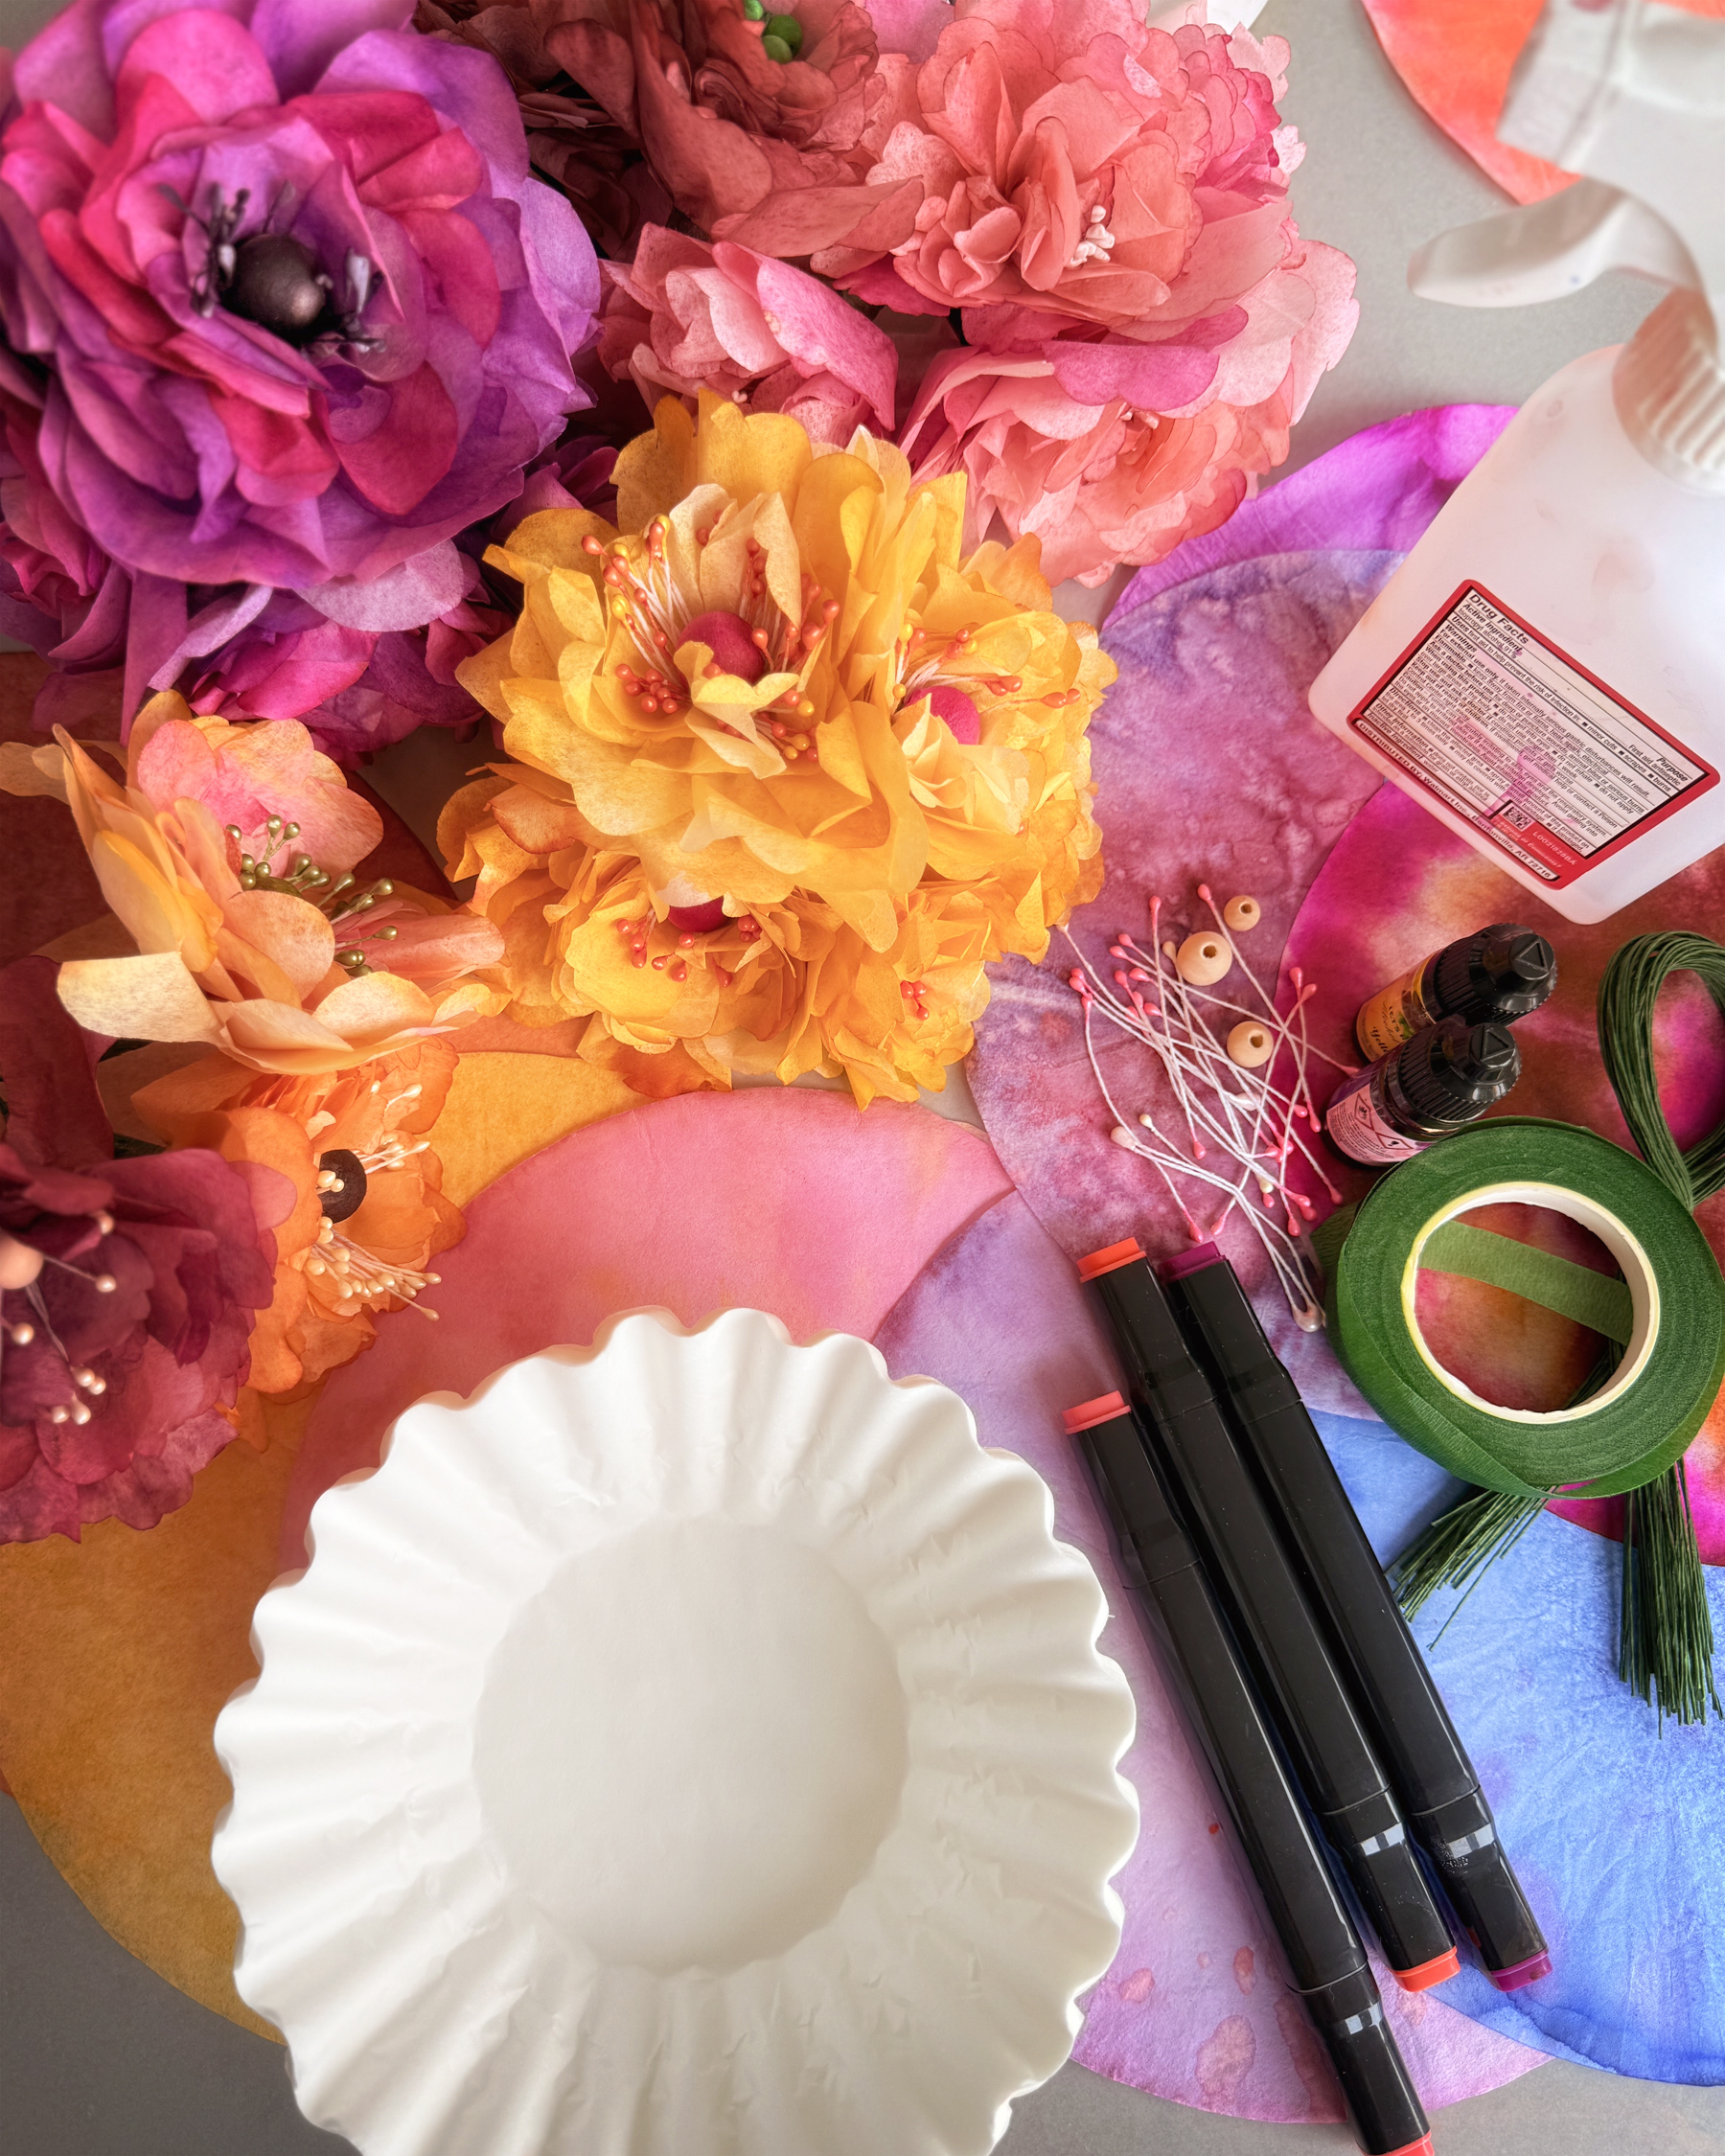
- The petals are made from dyed coffee filters. I use the cheapest filters I can find because they’re thinner and absorb the color easily. I like the white ones because the colors are more vibrant, but you can use the unbleached ones if you want more muted colors. I use the 8-12 cup basket filter style (that’s what you’re most likely to find on the shelf) but if you can find larger or smaller ones, you can absolutely use those too!
- I dye them with alcohol inks (or alcohol ink-based markers) and rubbing alcohol. You can easily find inexpensive sets of a few dozen colors of alcohol ink online or in big craft stores. One set of inks will make dozens and dozens and dozens of flowers. You can also use alcohol ink markers if you have them (to test if it’s an alcohol ink-based marker, scribble on a paper towel and drip alcohol on the mark, if it runs, it’s alcohol ink). I strongly recommend getting the 90% alcohol (rather than the 70% kind) because it dries much faster.
- To hold your flowers together, you’ll need floral wire & floral tape. Any sort of thin wire you can easily fold in half is fine, so if you have some handy, feel free to substitute it for floral wire. There’s not really a good substitute for floral tape, so you will need that, but it’s inexpensive and easy to find.
- If you want to make fancy centers for your flowers, you’ll want beads & stamens. I used wooden beads (because you can dye them the same way you dye the filters) and floral stamens. Stamens come in packages of several hundred for a few dollars, and you can find them online or in large craft stores. You can absolutely experiment with other things in the center of your flowers if you want!
- You’ll also want a few basic office supplies (scissors, a pencil), a little bowl you don’t mind using with ink (it will probably wash off just fine, but better to be safe), and an iron. A tube of quick dry glue is optional but comes in handy to make your flowers a bit sturdier.
- If you’re worried about getting ink on your hands, you might want gloves (I didn’t bother, and it all washes off in a day or two, but it’s an option if you don’t want to risk it), and you might want to put something like a garbage bag down on your work surface to protect it as you dye. You may also want some paper towels handy for cleanup.
Links
If you want links for the exact stuff I used, we can do that. These are amazon affiliate links. Amazon is eeeeeeevil though, so if you can find things at a local store, totally do that instead! But I understand not everyone had a local store or the ability to go to the store, and sometimes amazon is easiest. But if you’re going to get it from the bad guys, and you use these links, they’ll share a little of their ill-gotten gains with me.
- Filters I used both bleached (white) and unbleached (brown) ones
- Alcohol inks I used both this set and this one
- Alcohol ink-based markers I used this set
- Floral wire & tape I used this set which has wire, tape, and wire cutters
- Centers I used these beads and several different sets of stamens
Again, the book is coming next week. Utter and Rampant Nonsense folks will get it automatically (yes, you will totally still have it even if you later cancel or change your membership…once you have it it’s yours, because I’m old enough that I still think that’s how it should work). It will be available on its own too if that’s more your speed. And I’ll be putting up a bunch of videos over the next few days to show you more of the process, just in case you’re worried it’s hard!
Mailing List
Want to hear when a new pattern comes out or something fun is going on? Sign up below!
Patreon
Want to support the content I create, get nifty bonus material for some of my favorite patterns, or get every new release delivered right to your inbox? Head over to patreon and sign up!