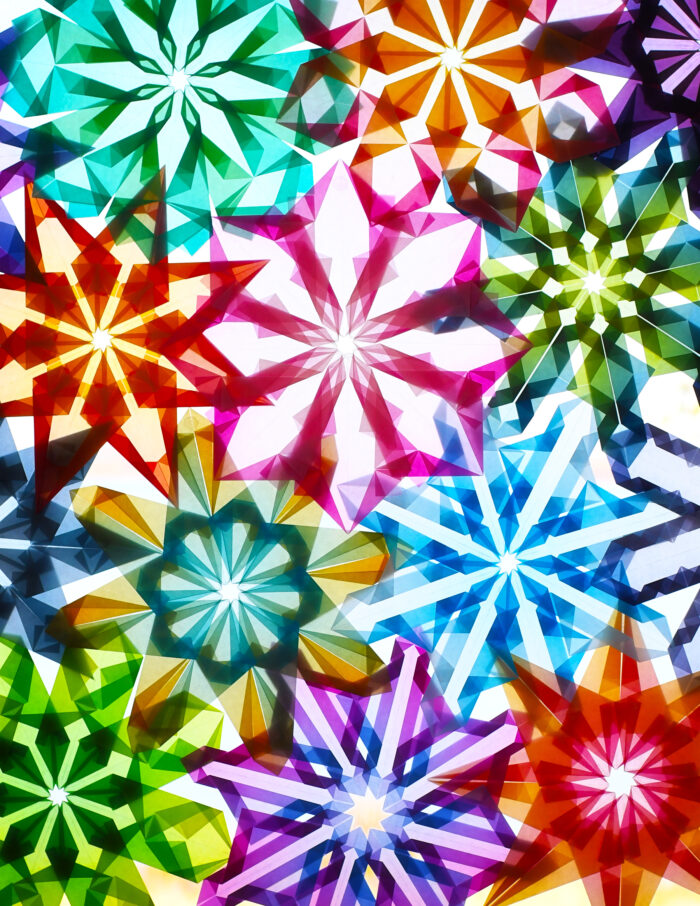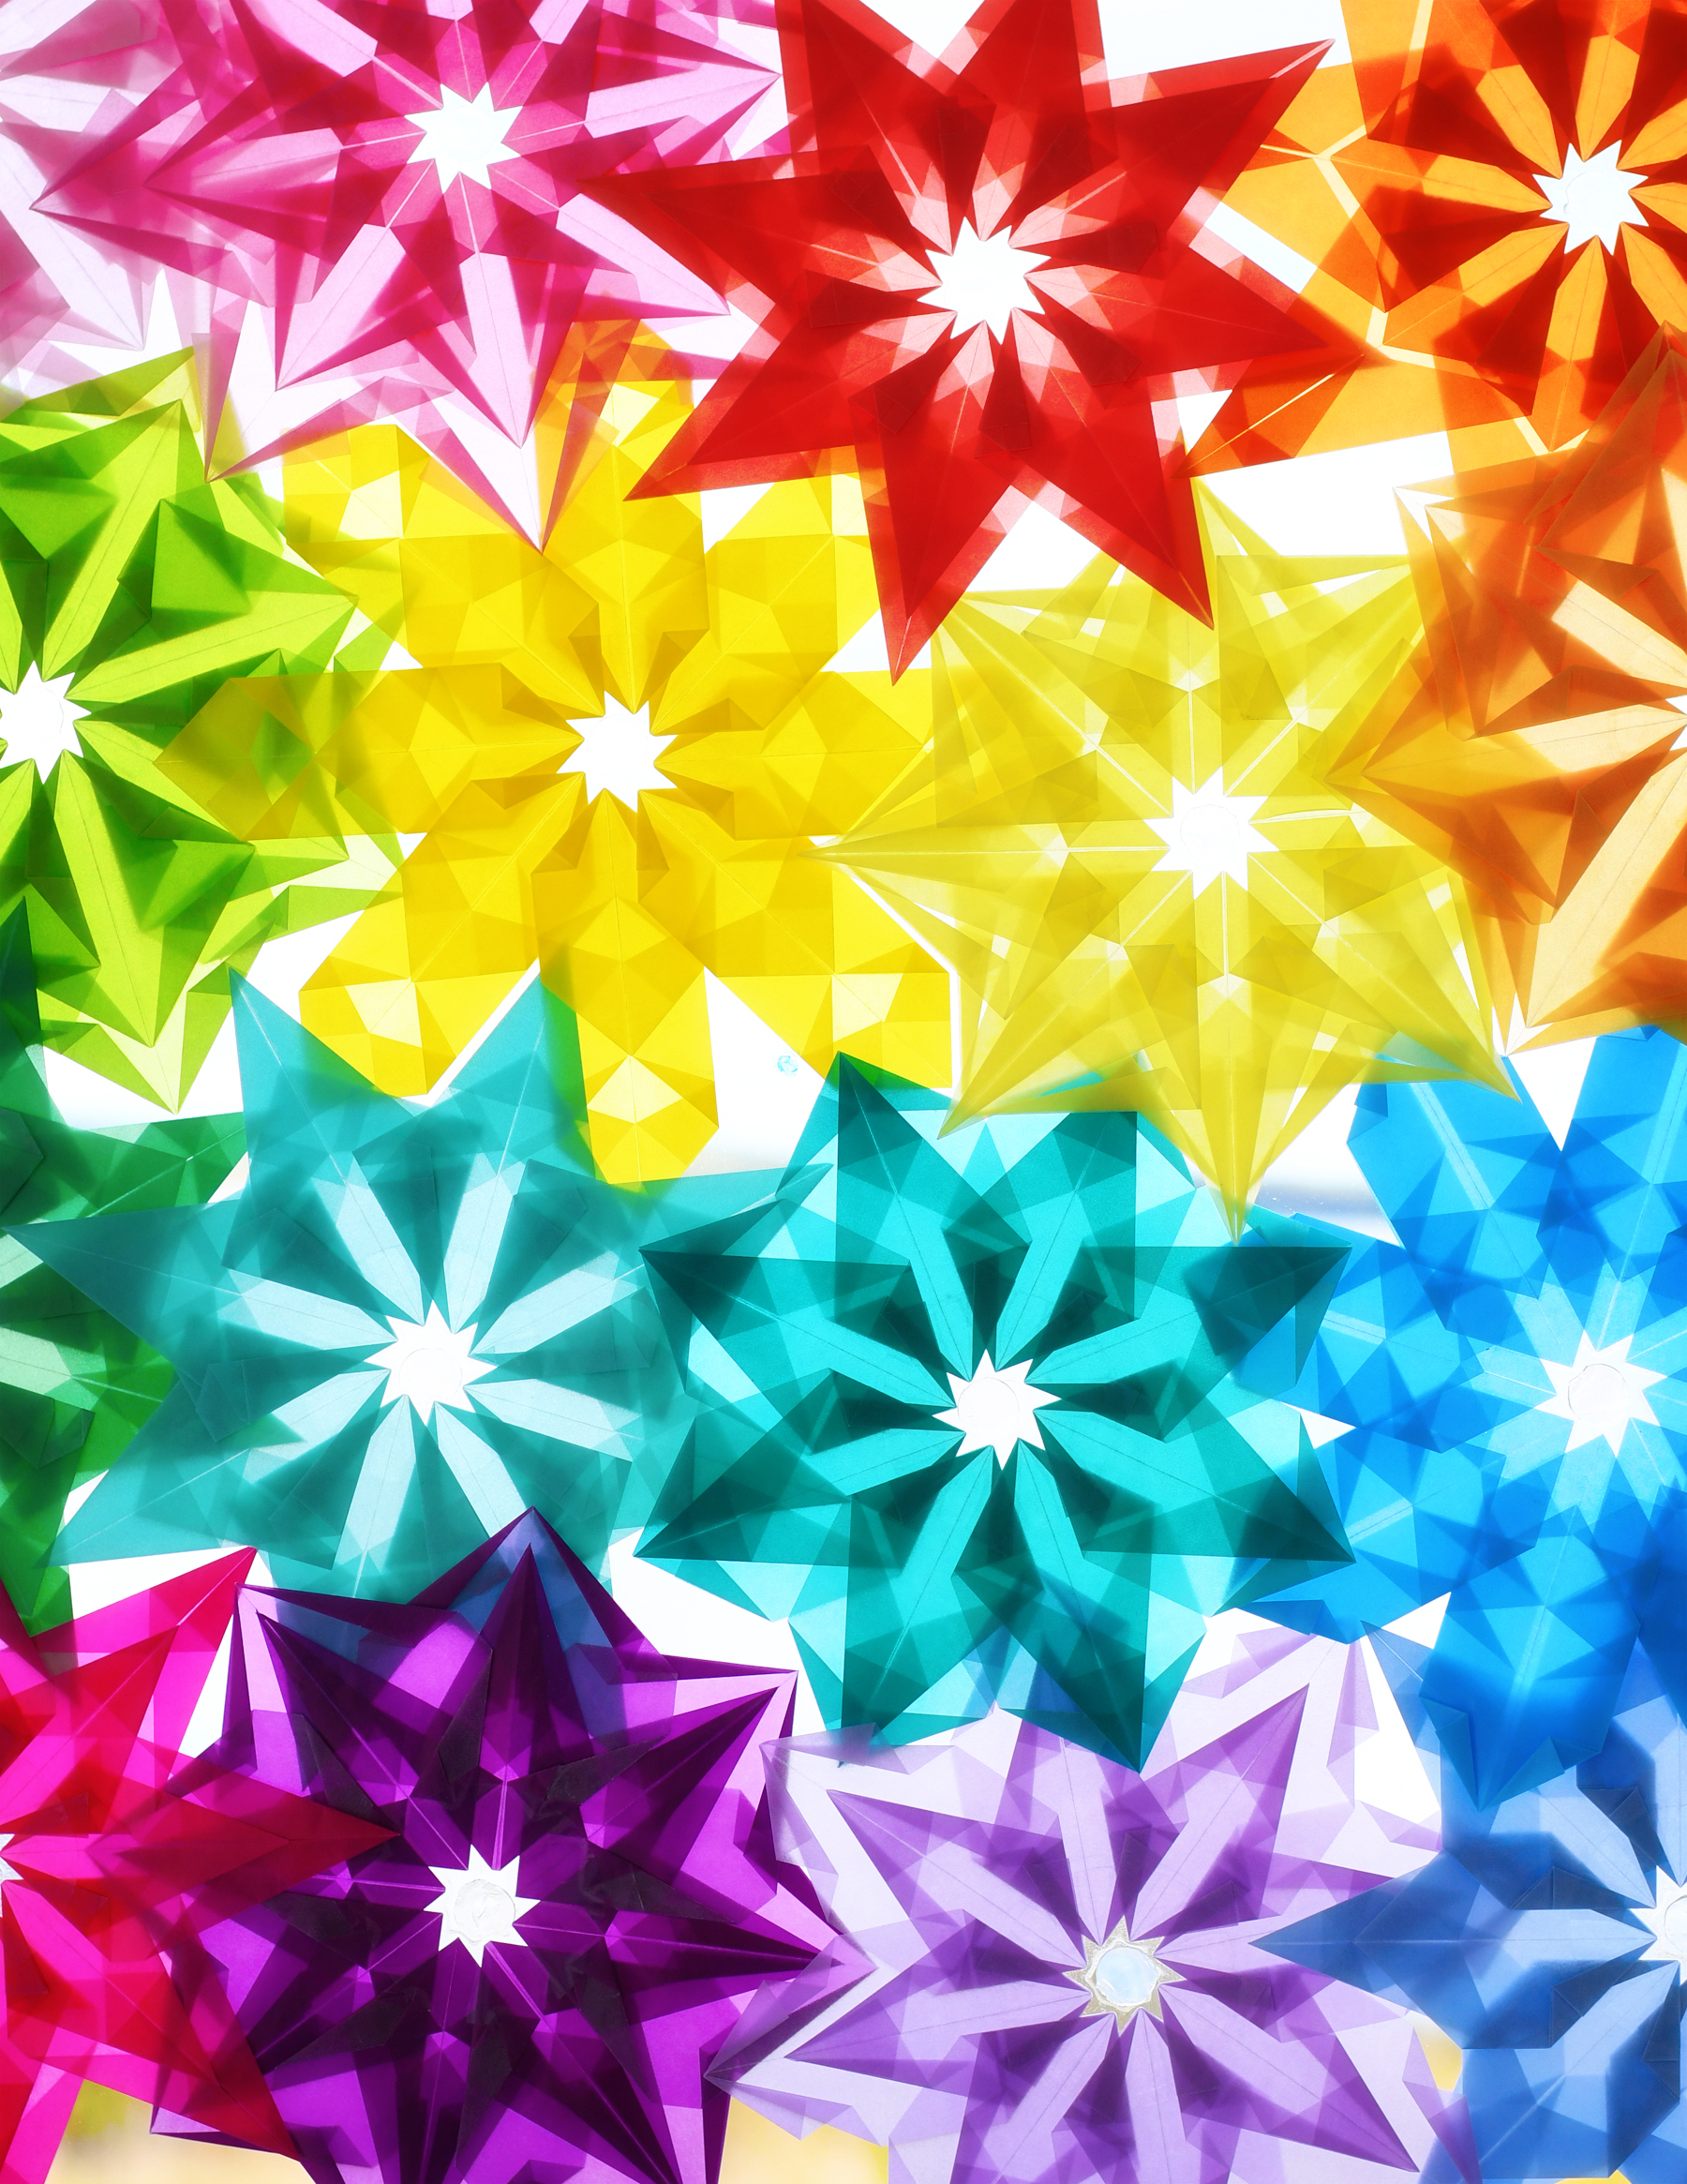
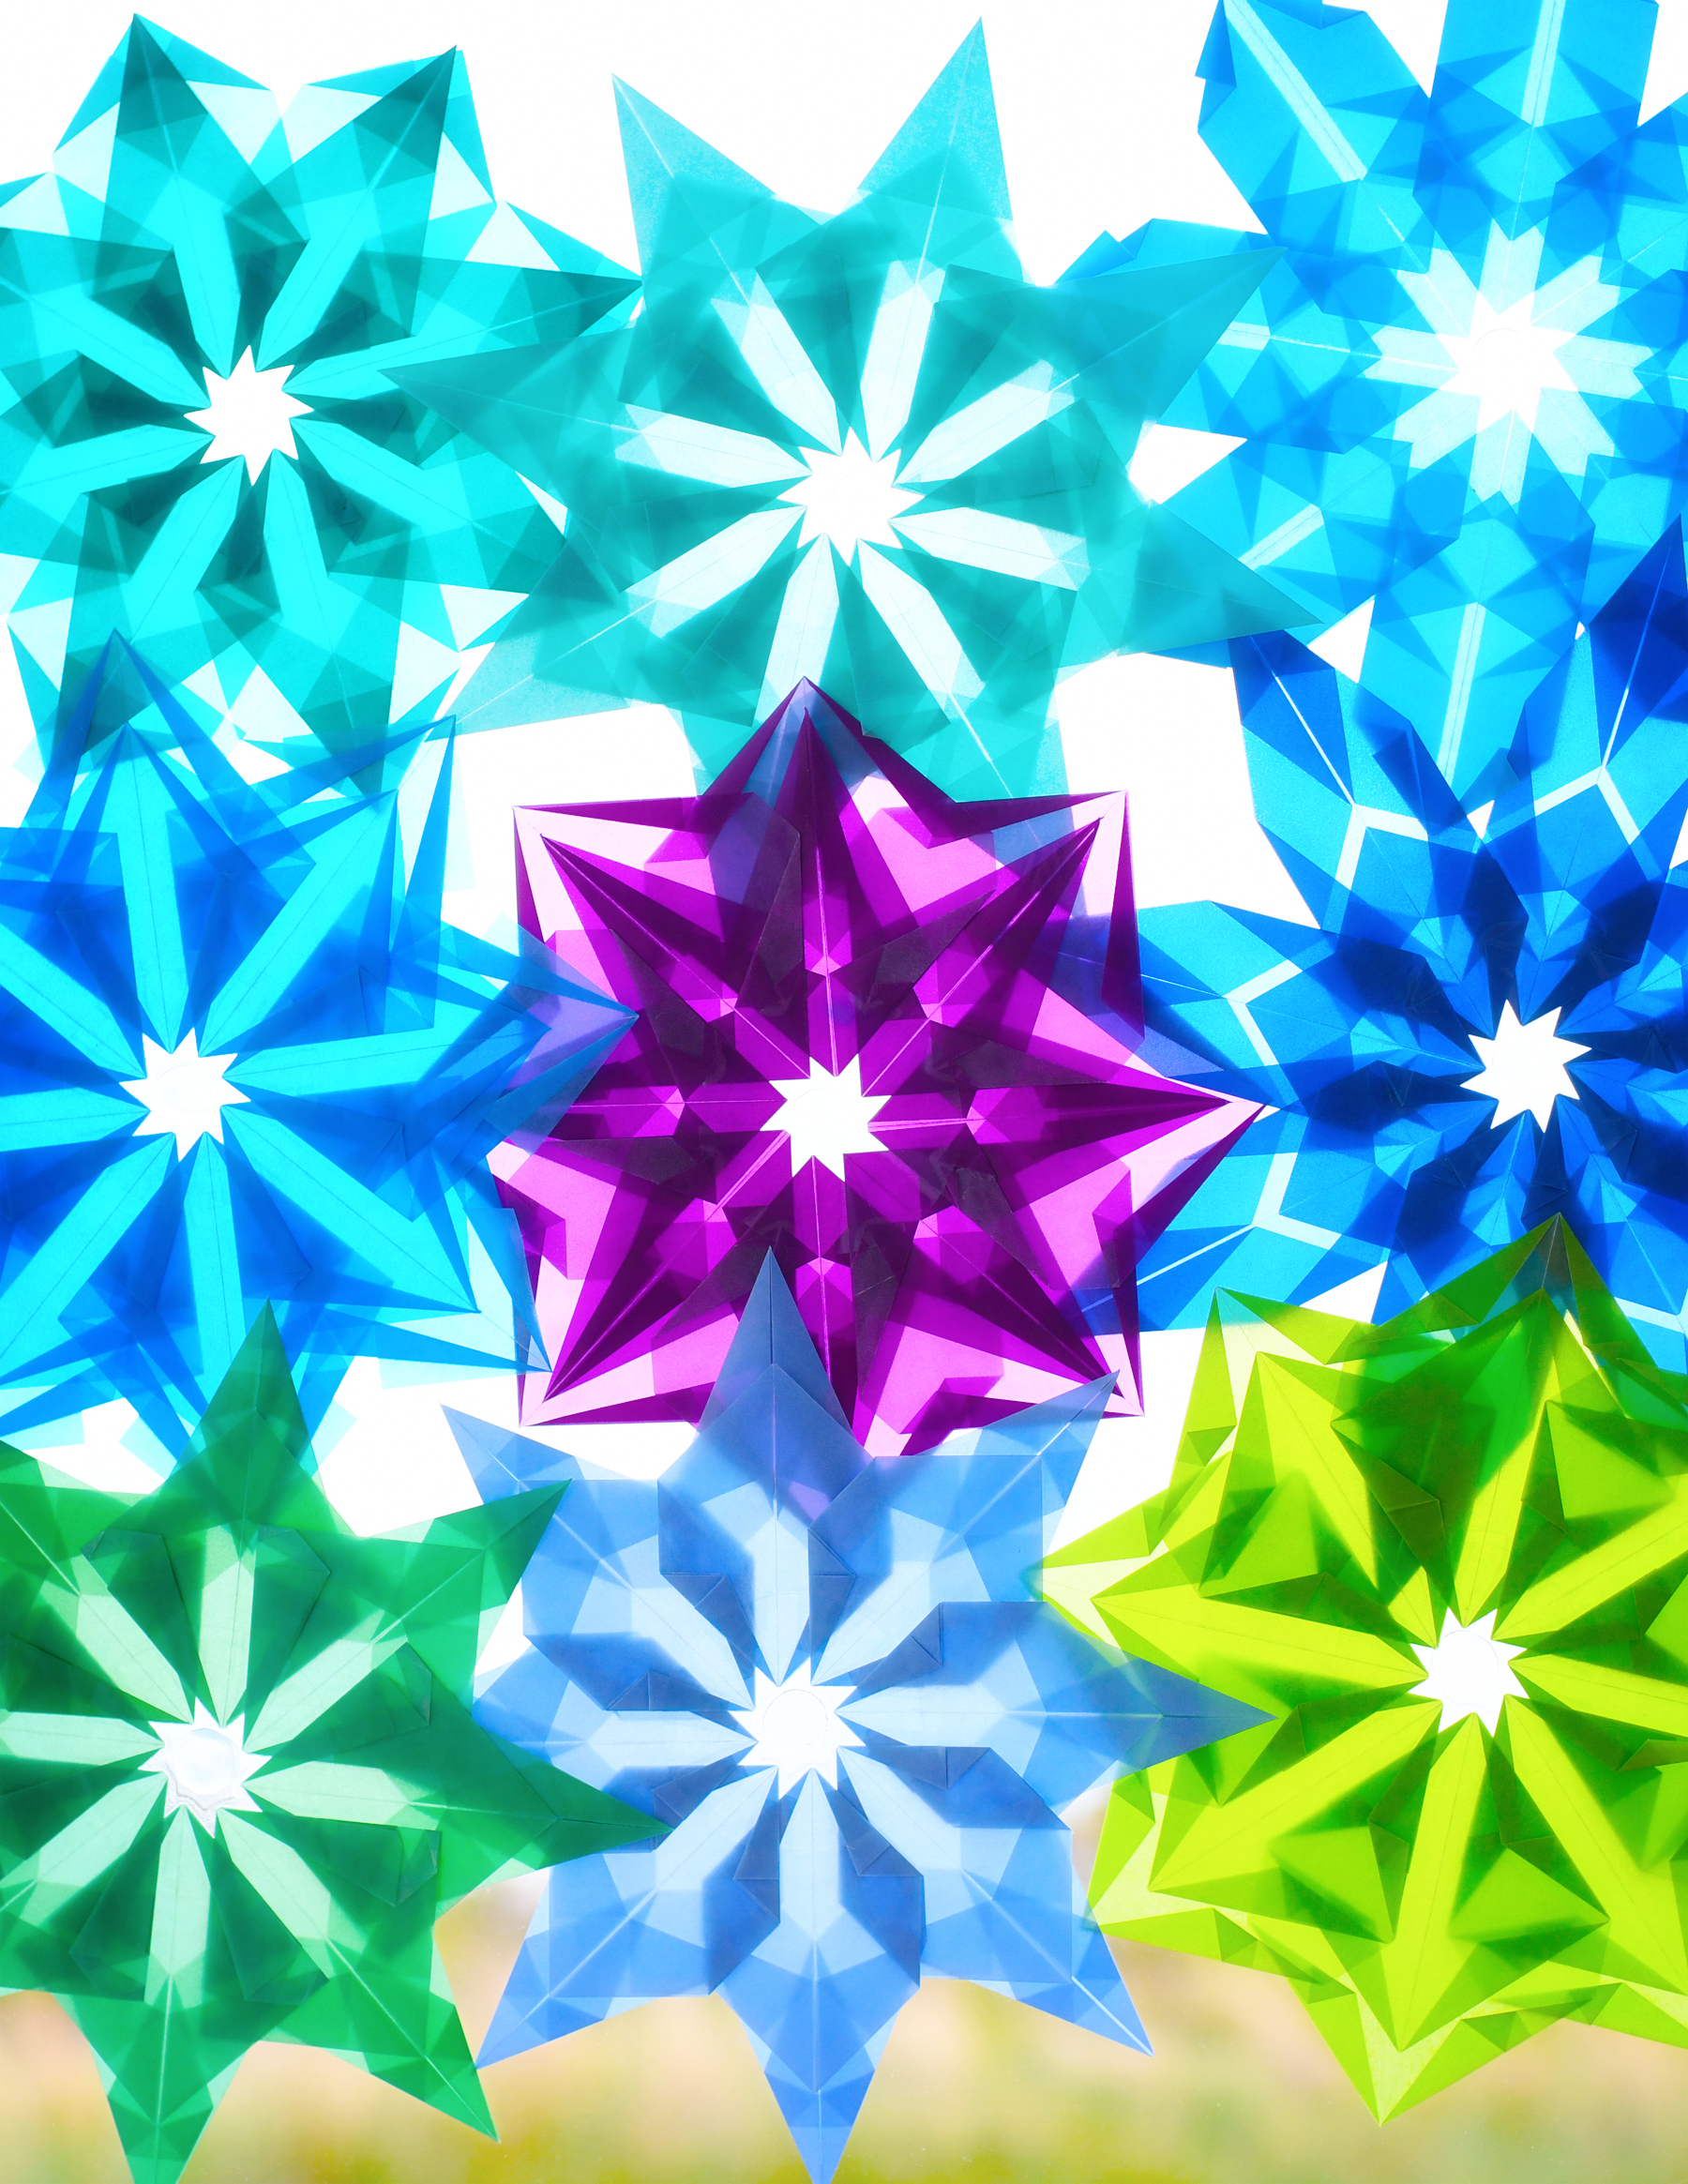
Gleaming
$15.00
This is a digital download (a PDF), not a physical object.
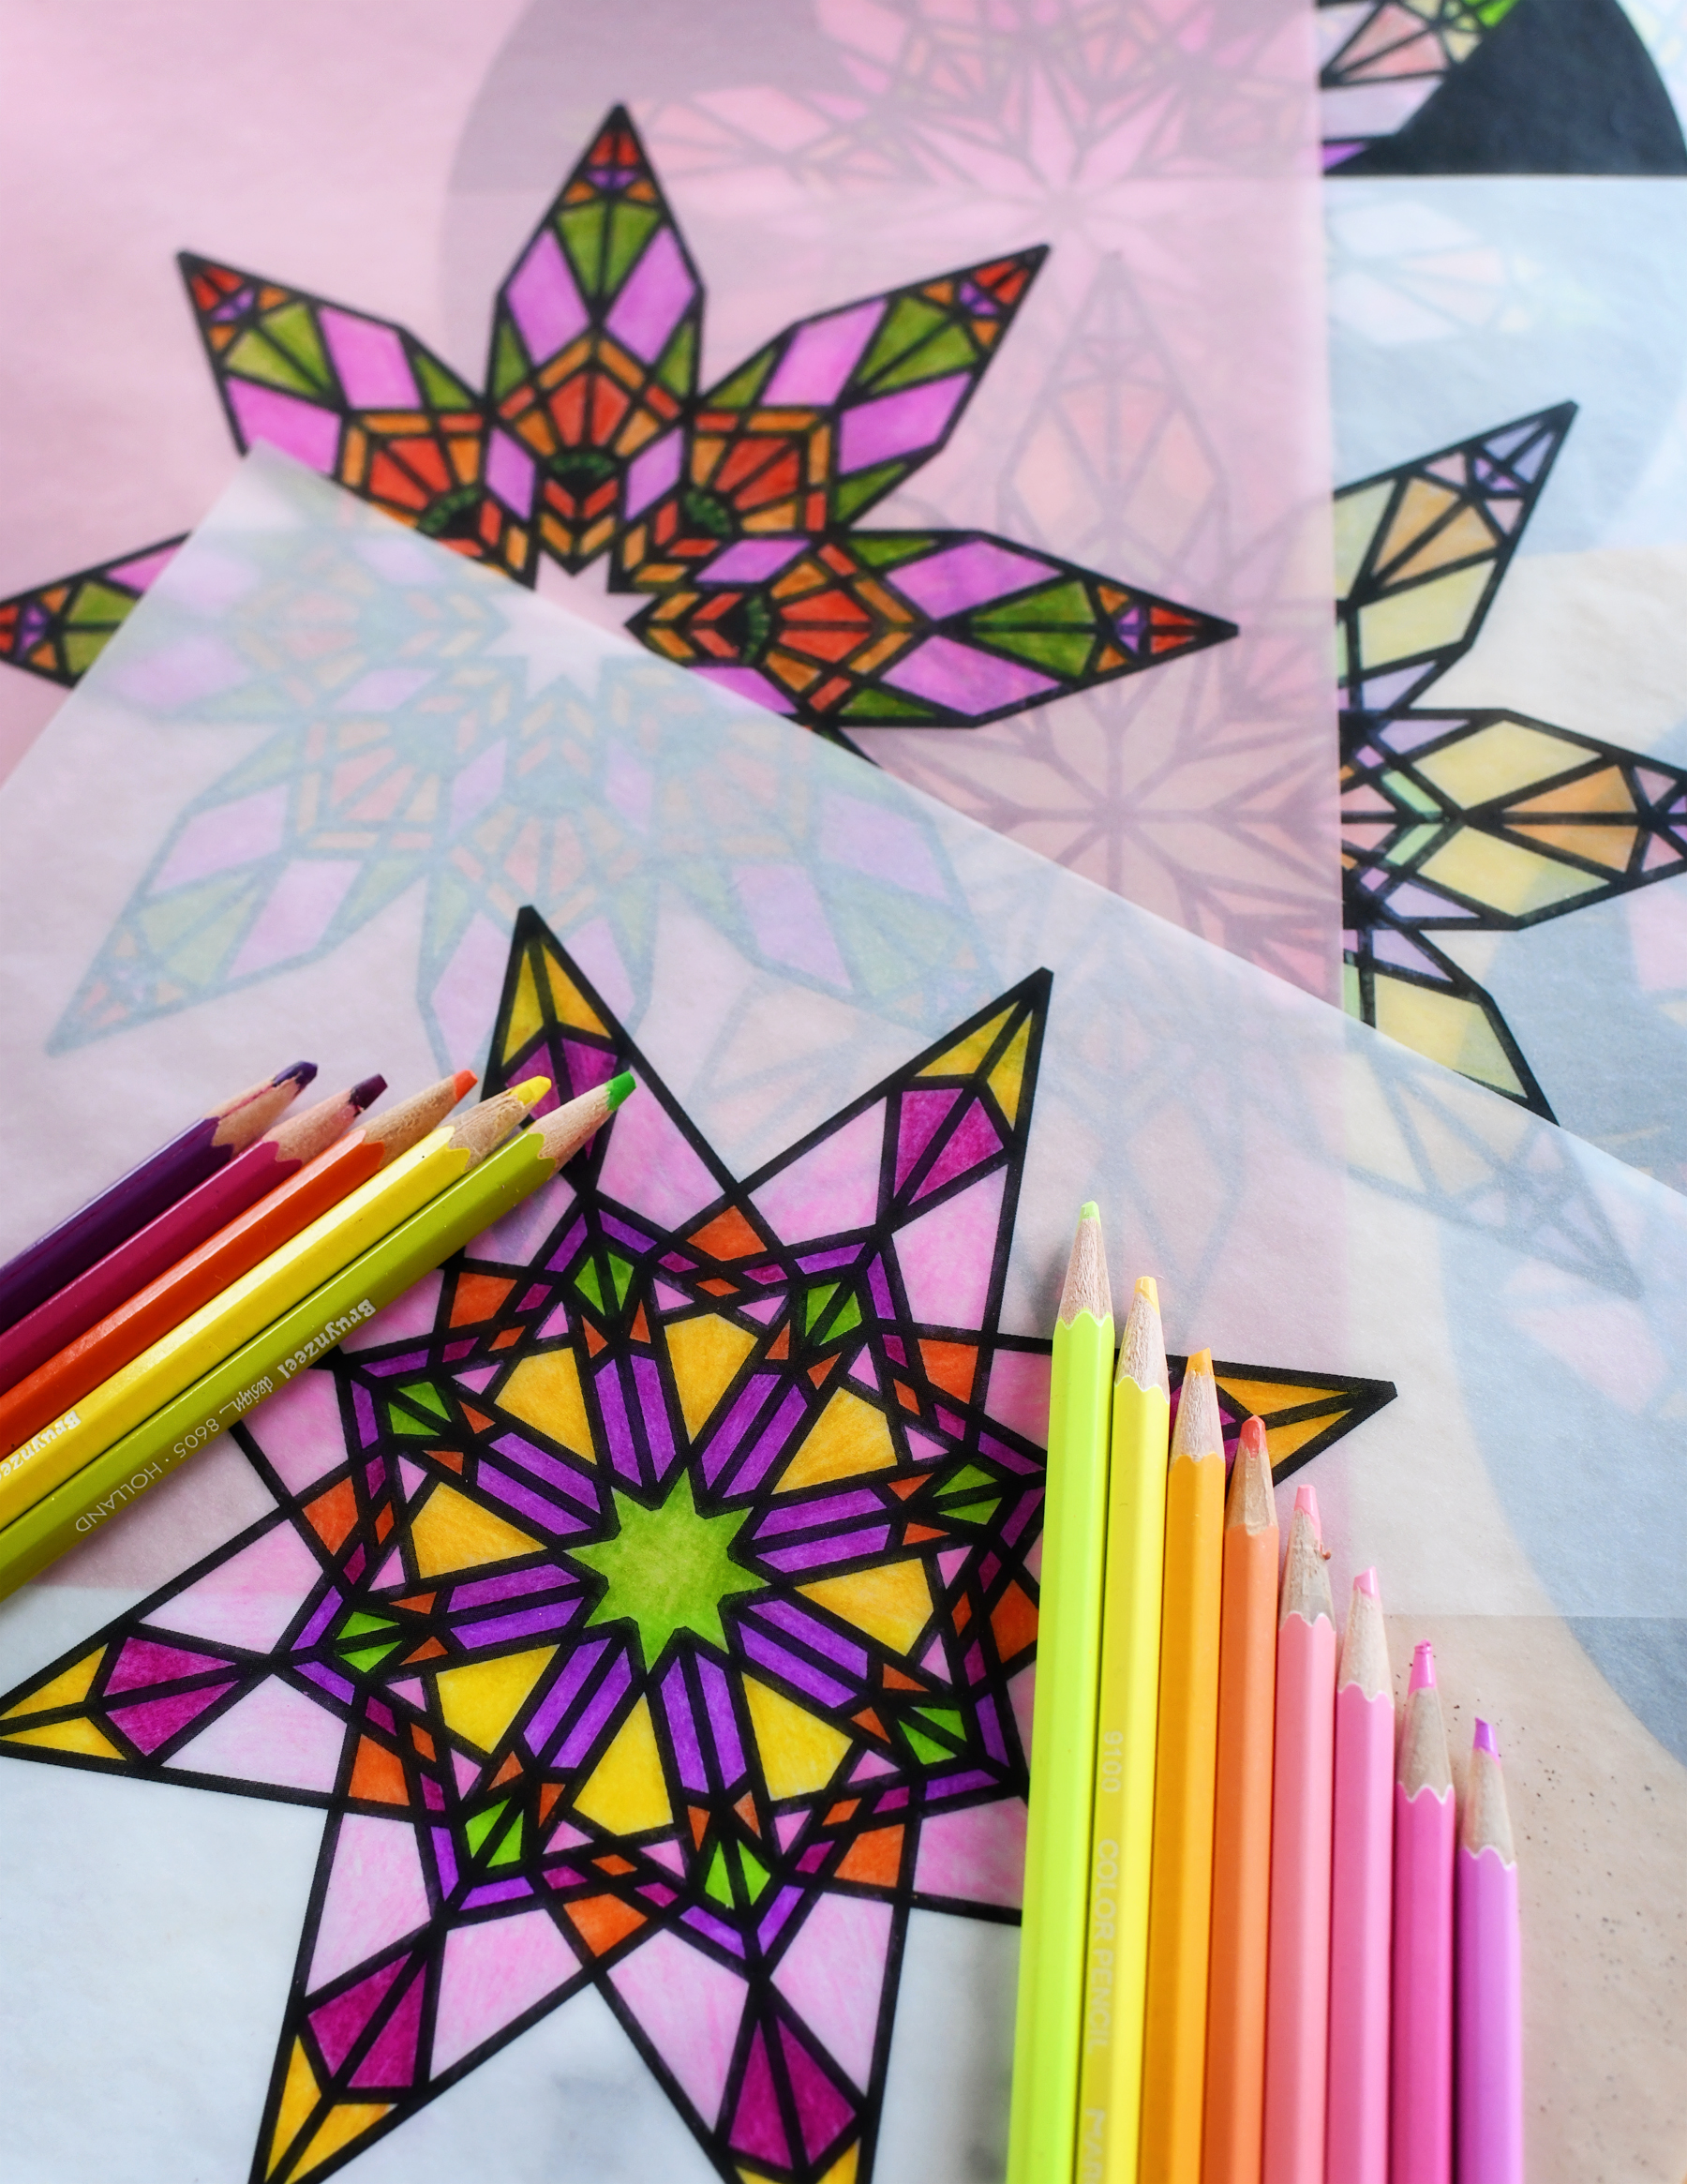
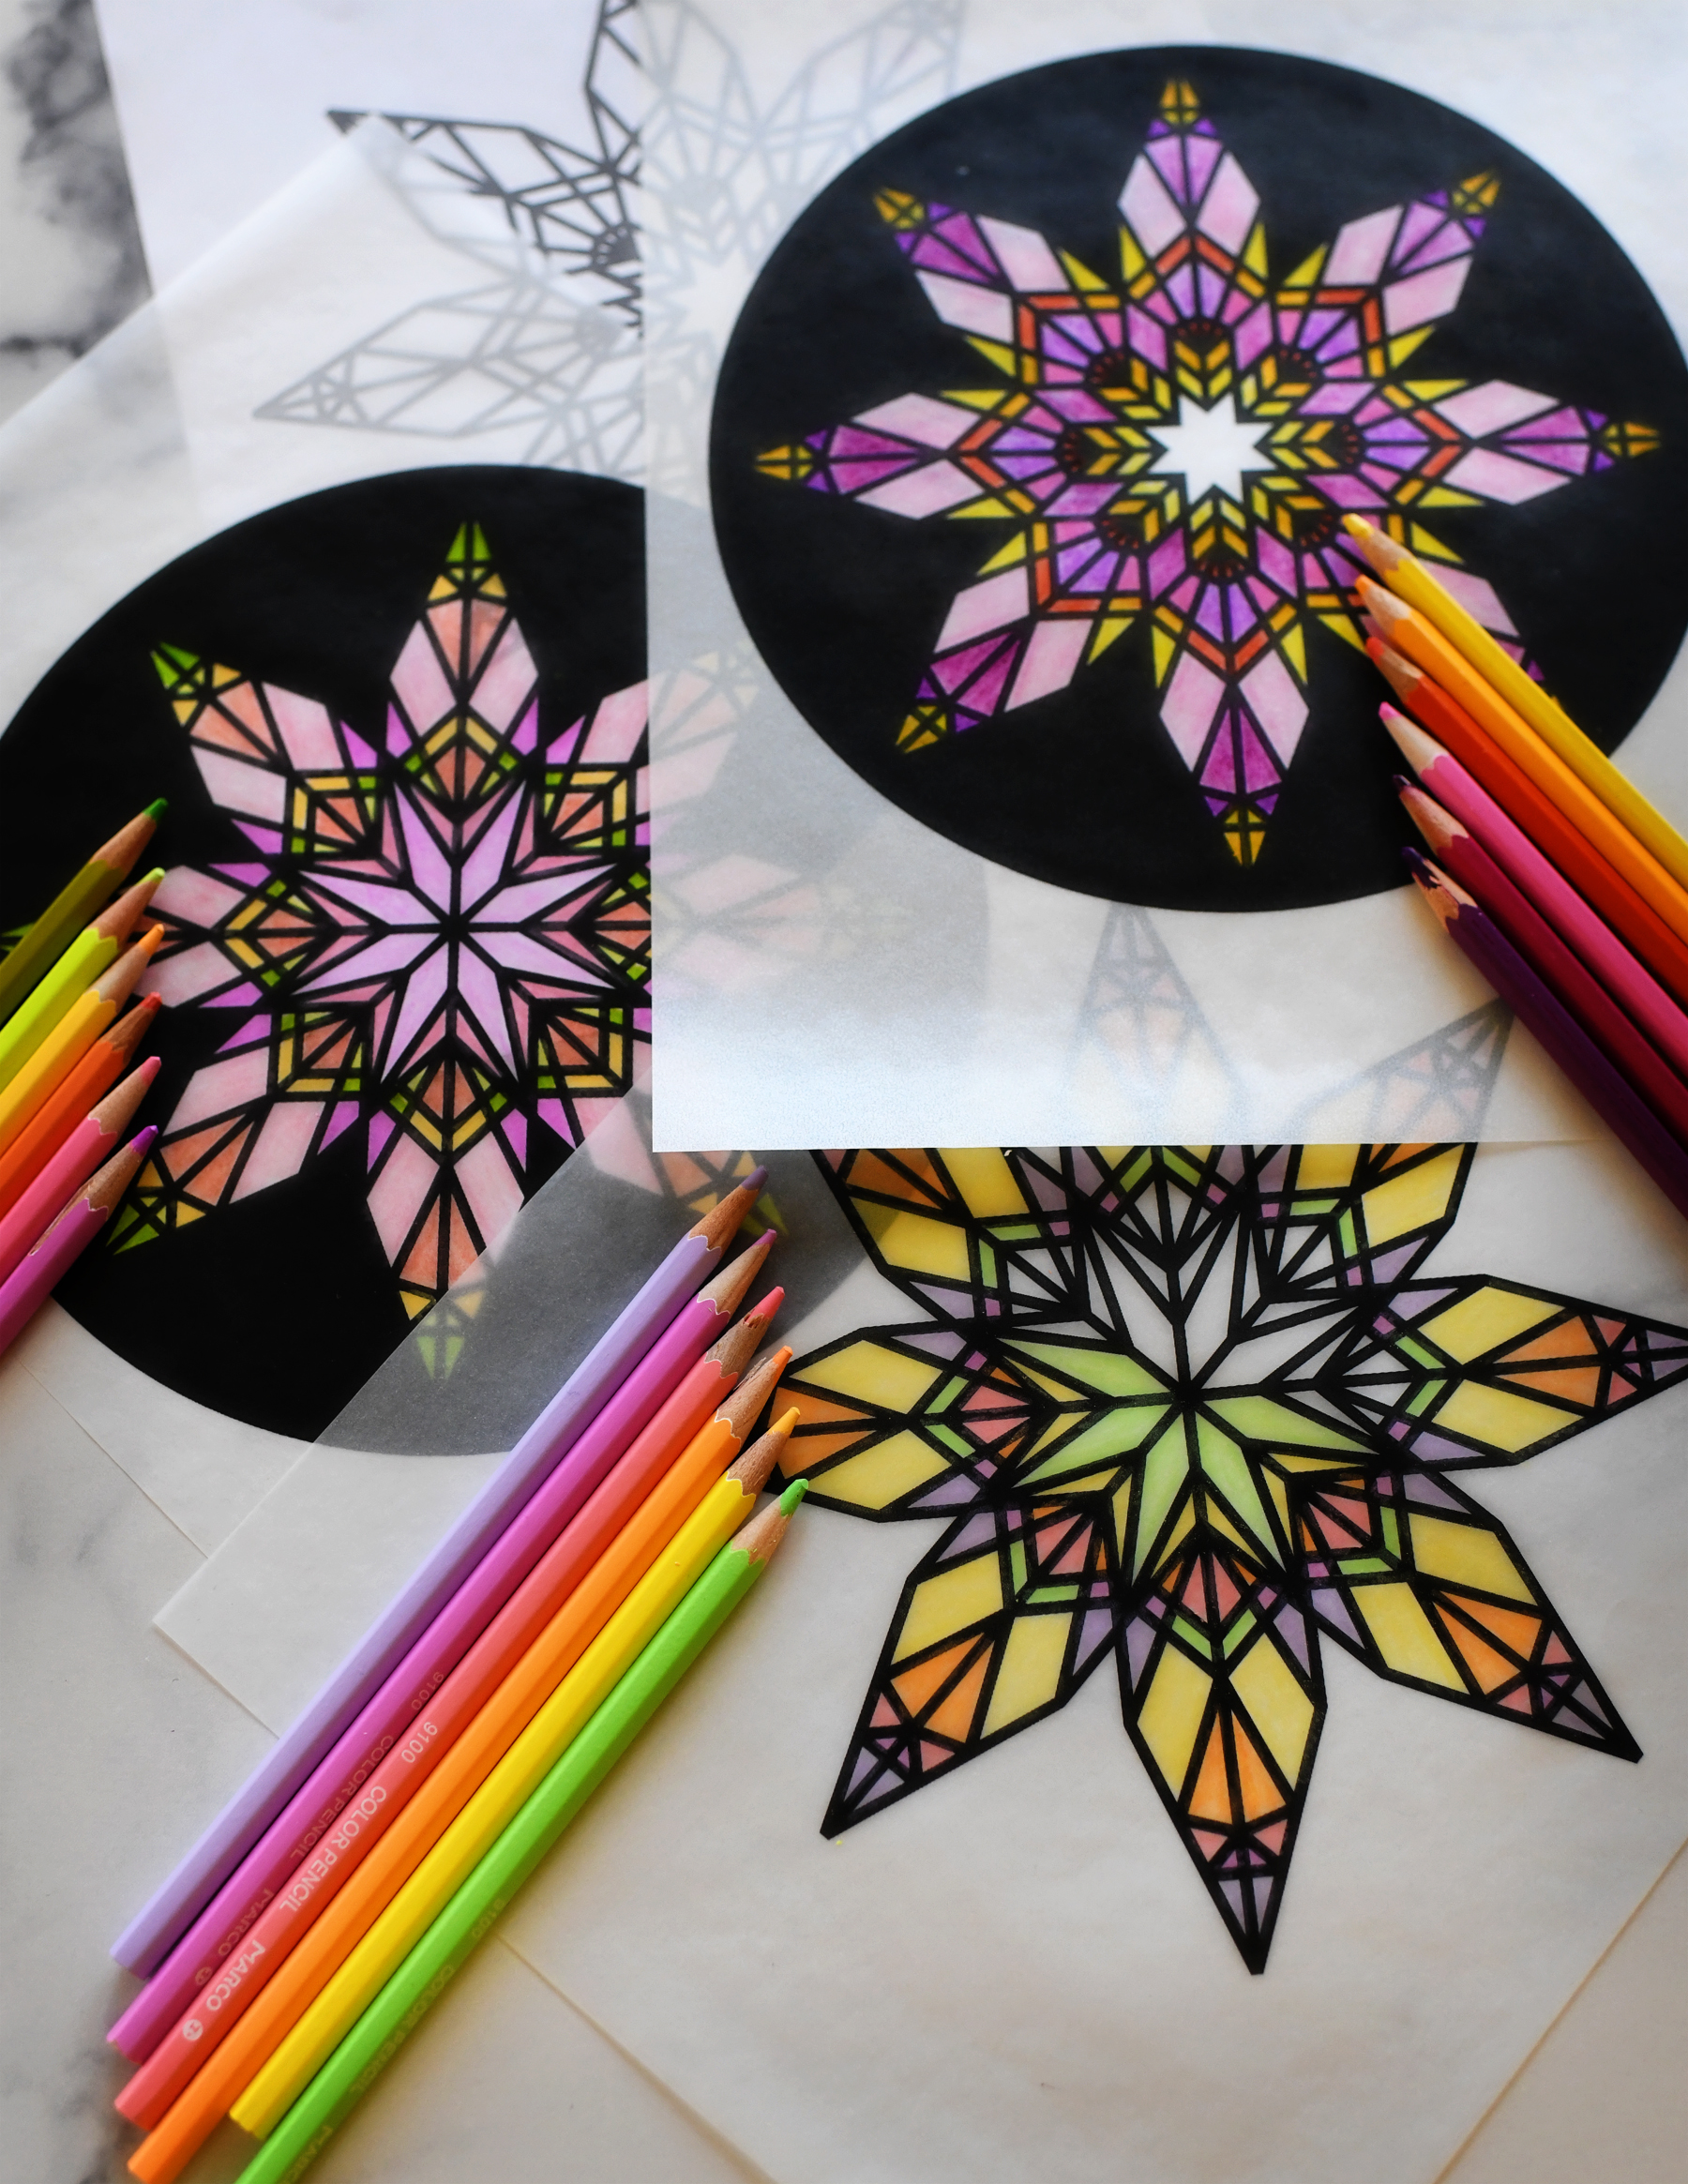
If you looked at these and though “ooooh, I wanna color them” you’re not alone! I’ve made a little coloring book with images of a couple of my favorites. It’s free, and you can download it over here! And if you’re worried they’re hard, I’ve got a little free download over here with some sample folds so you can try it out ahead of time to make sure you can do it.
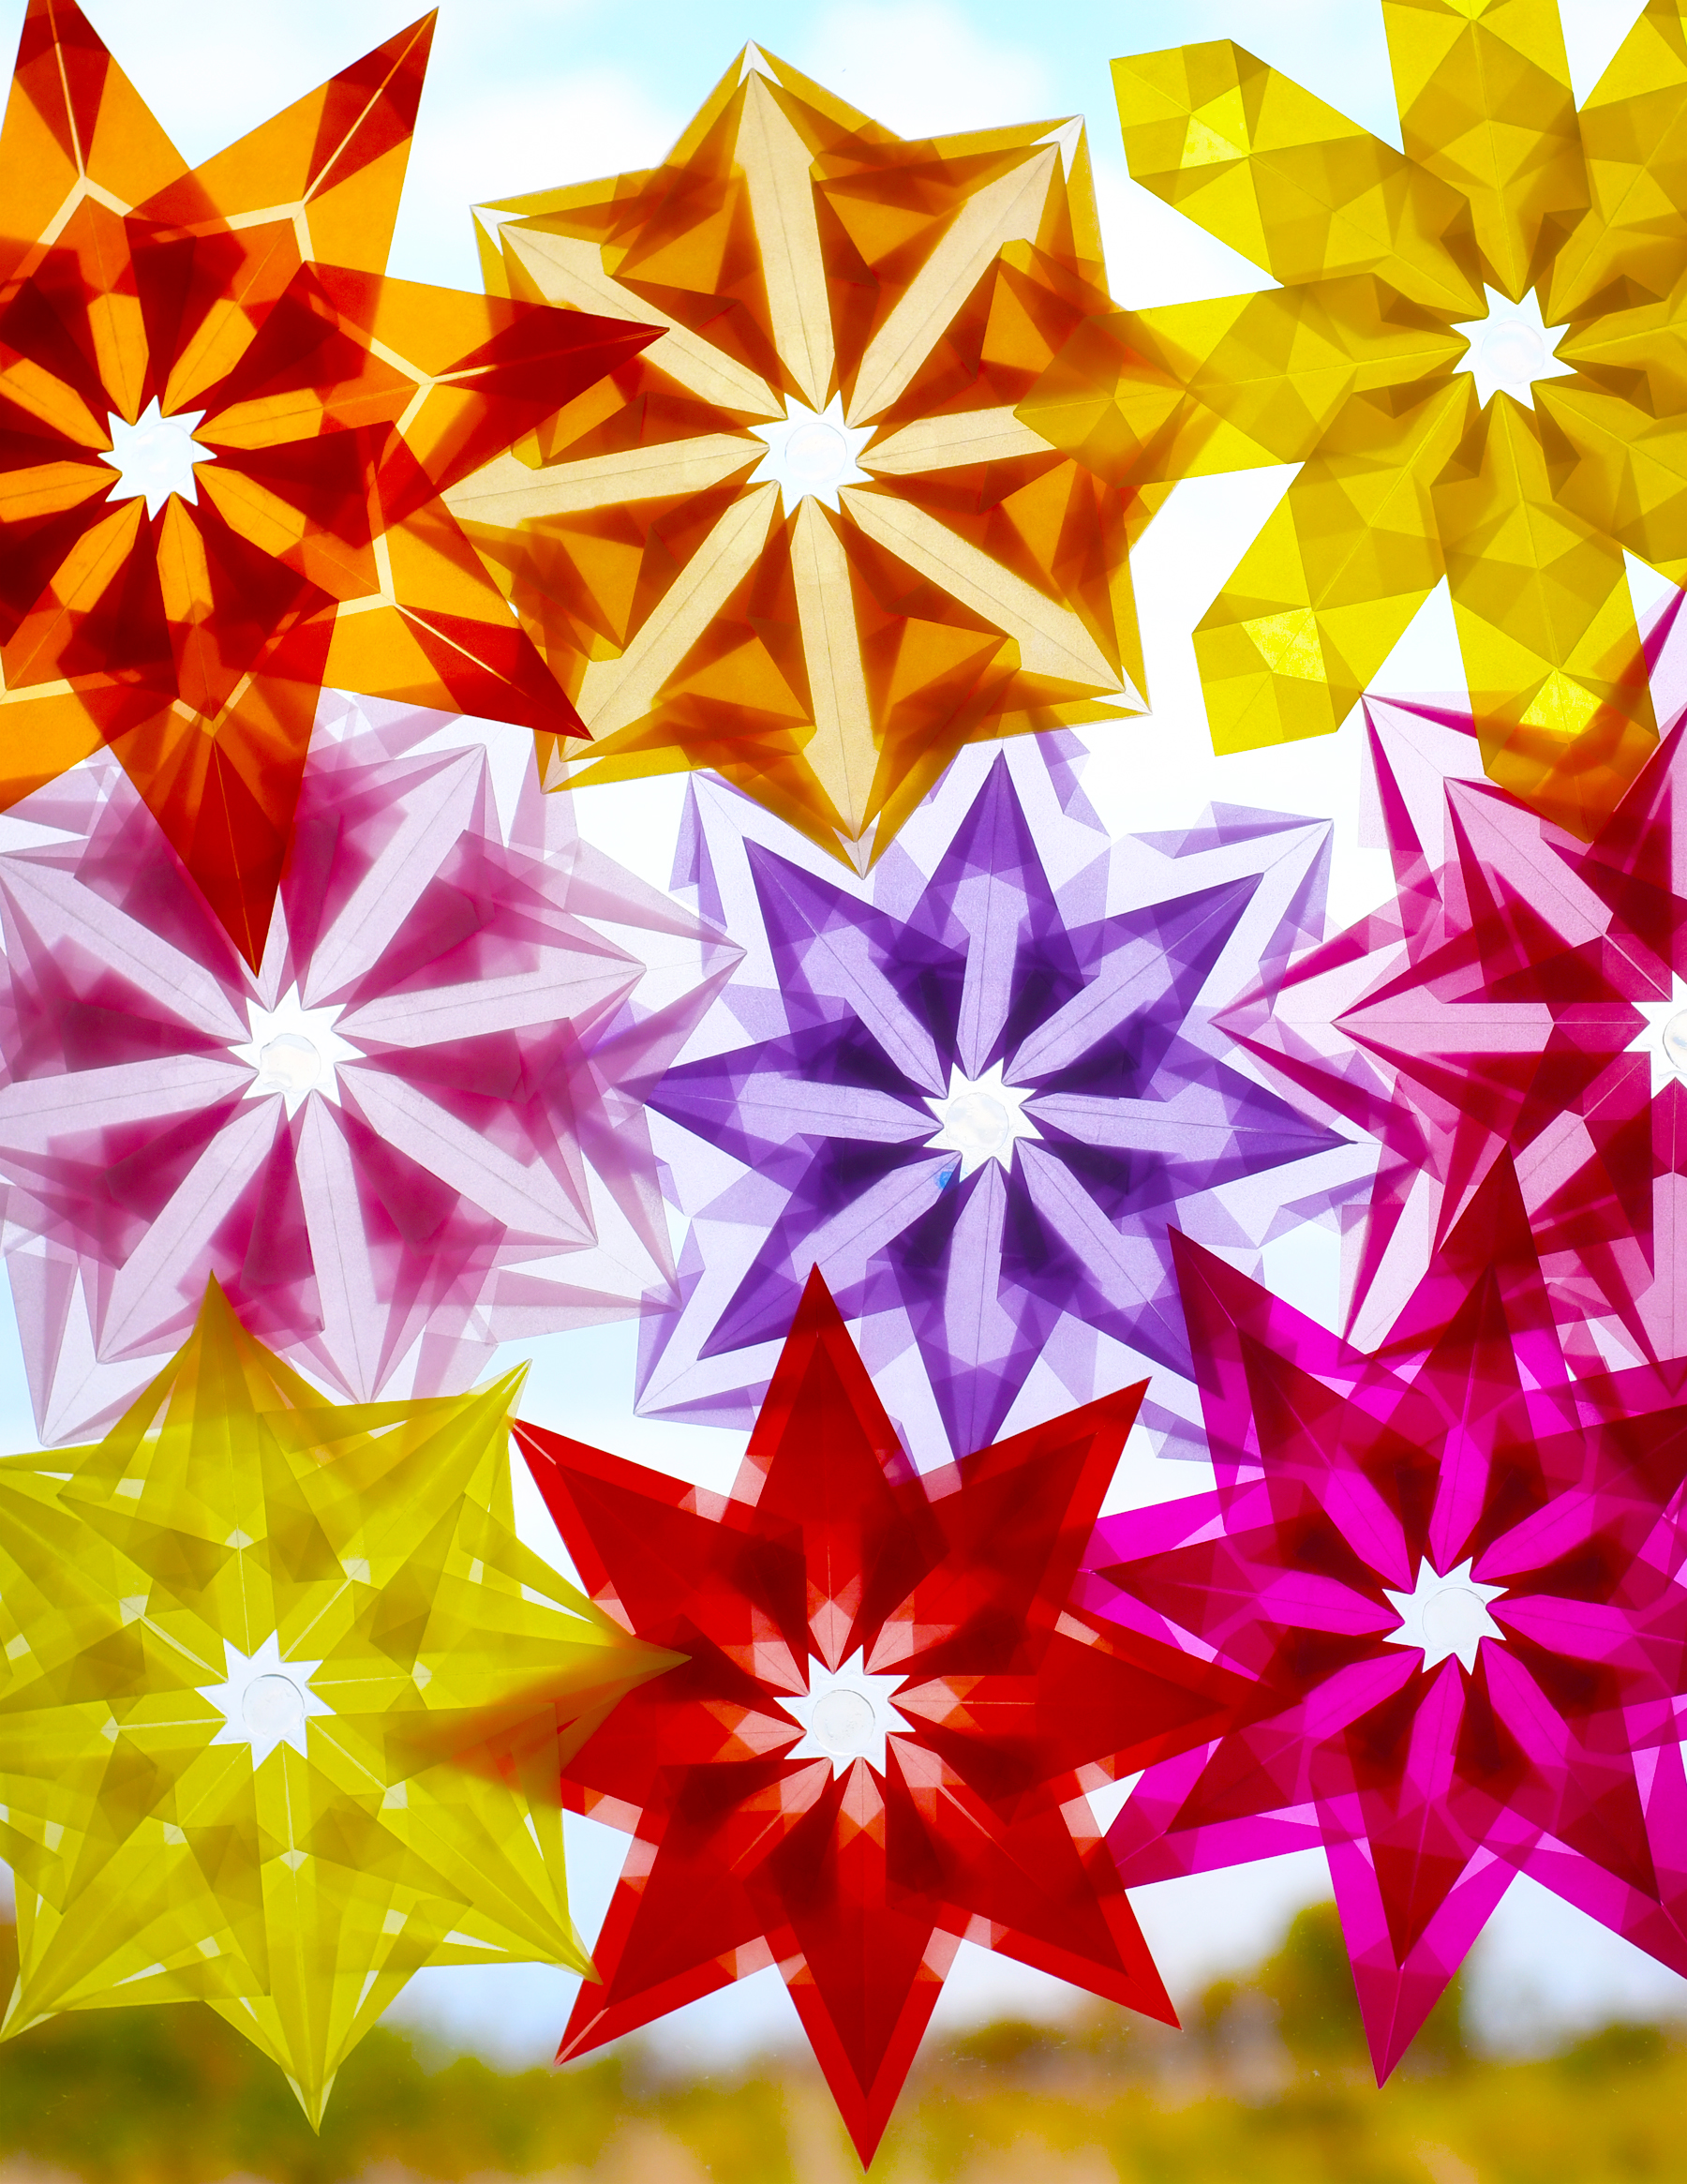
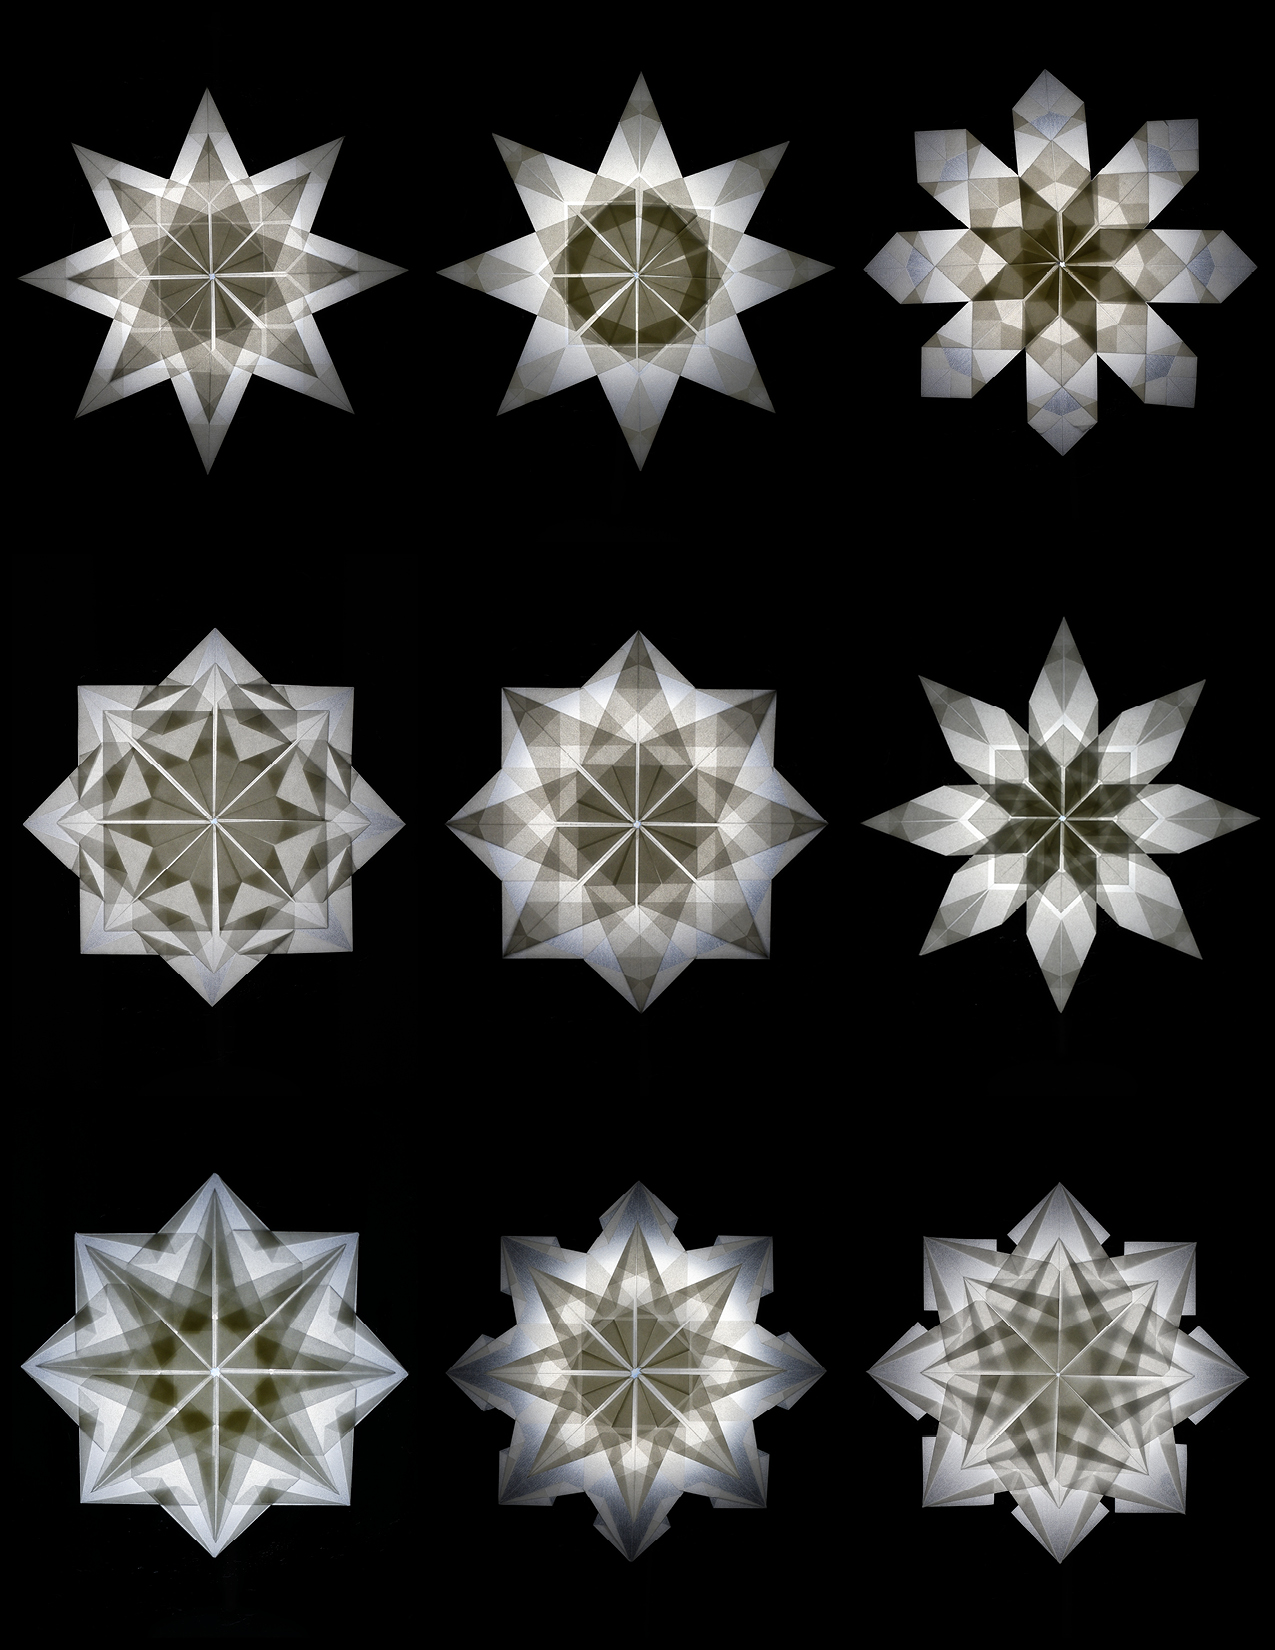
Every year, right about when the time changes and the sun starts setting well before dinnertime, I am overcome with the urge to make these. I fold them by the dozen and absolutely fill my windows. I can’t explain it. I can’t justify it. I have absolutely no idea how something made from nothing more than a few sheets of paper and a couple of stickers can be so utterly enchanting. But somehow they are.
They satisfy my brain in much the same way as knitting. You use simple materials (yarn, or paper), and a tiny handful of fundamental techniques (knit & purl stitches, or straight & diagonal folds), and repeat the same actions over and over (stitch after stitch after stitch, or fold after fold after fold). And somehow you end up with something that feels like so much more than the sum of its parts.
They’ve been a touchstone of my year for longer than I can remember (the family lore is that they were one of the holiday crafts the nuns at my German kindergarten taught me to make). They make even the darkest winter days seem just a bit brighter and more bearable. And, while I certainly don’t have the commanding presence of an elderly German nun, I absolutely love the idea of sharing them with all of you.
I hope they bring you a little light when the world feels dark!
General information
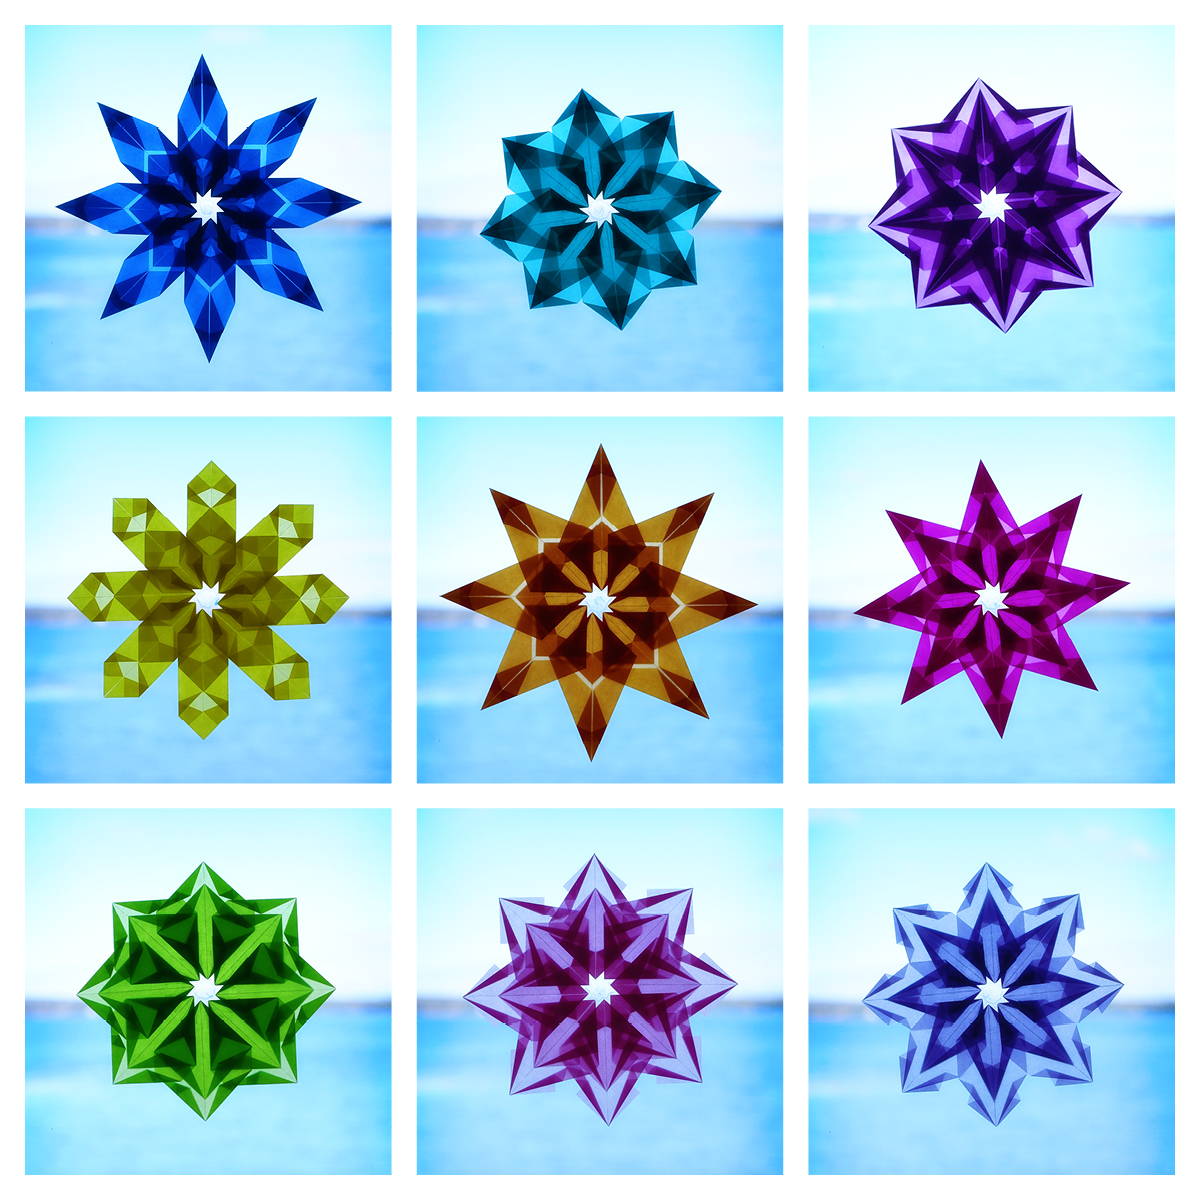
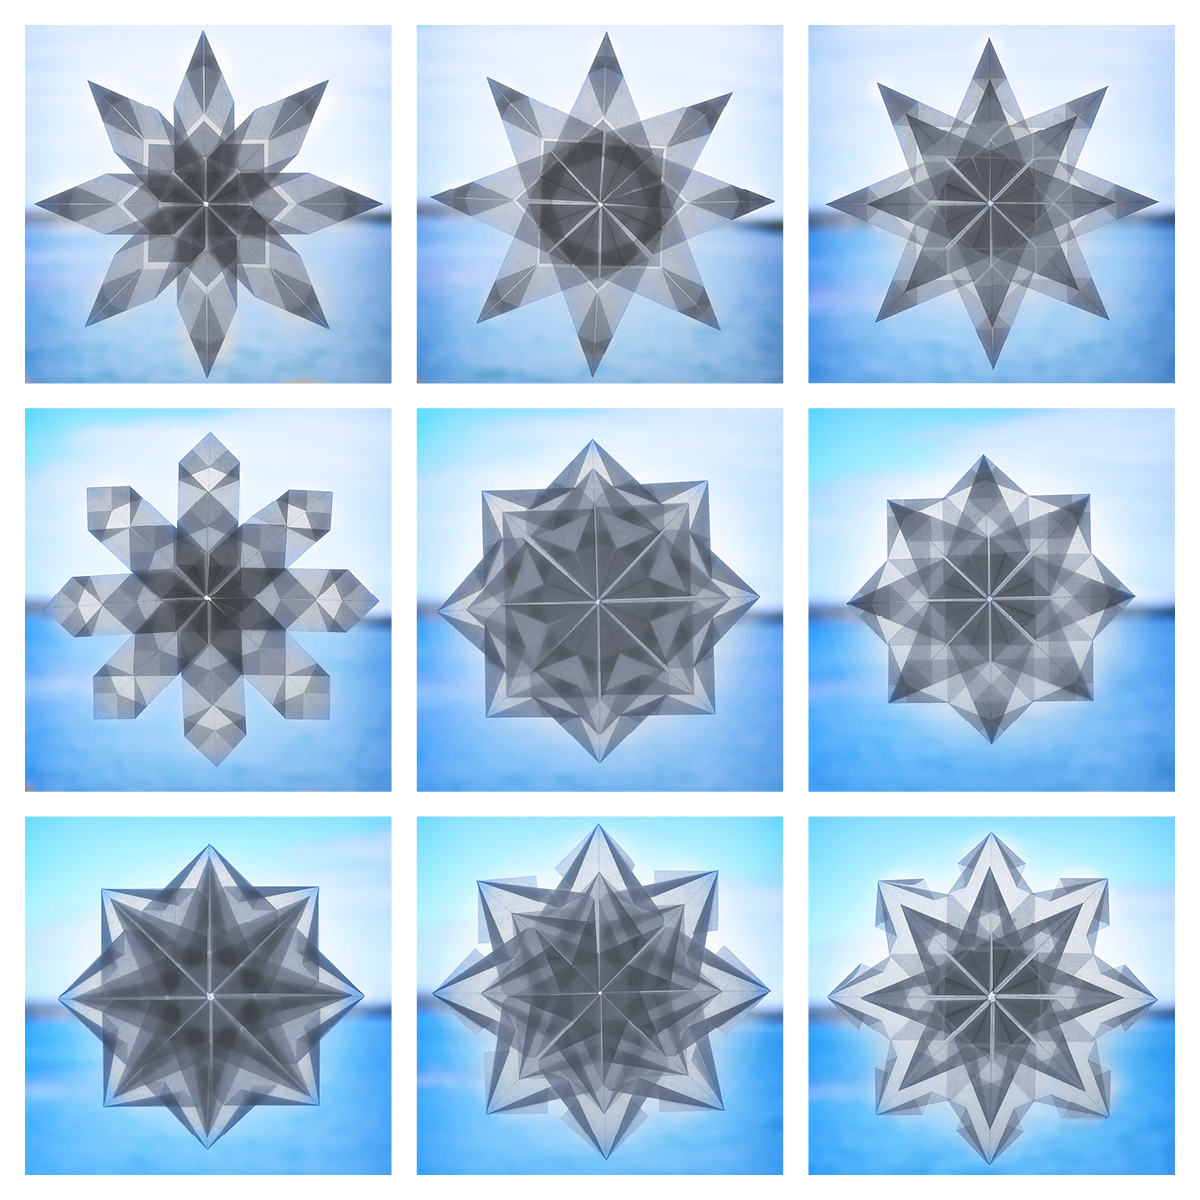
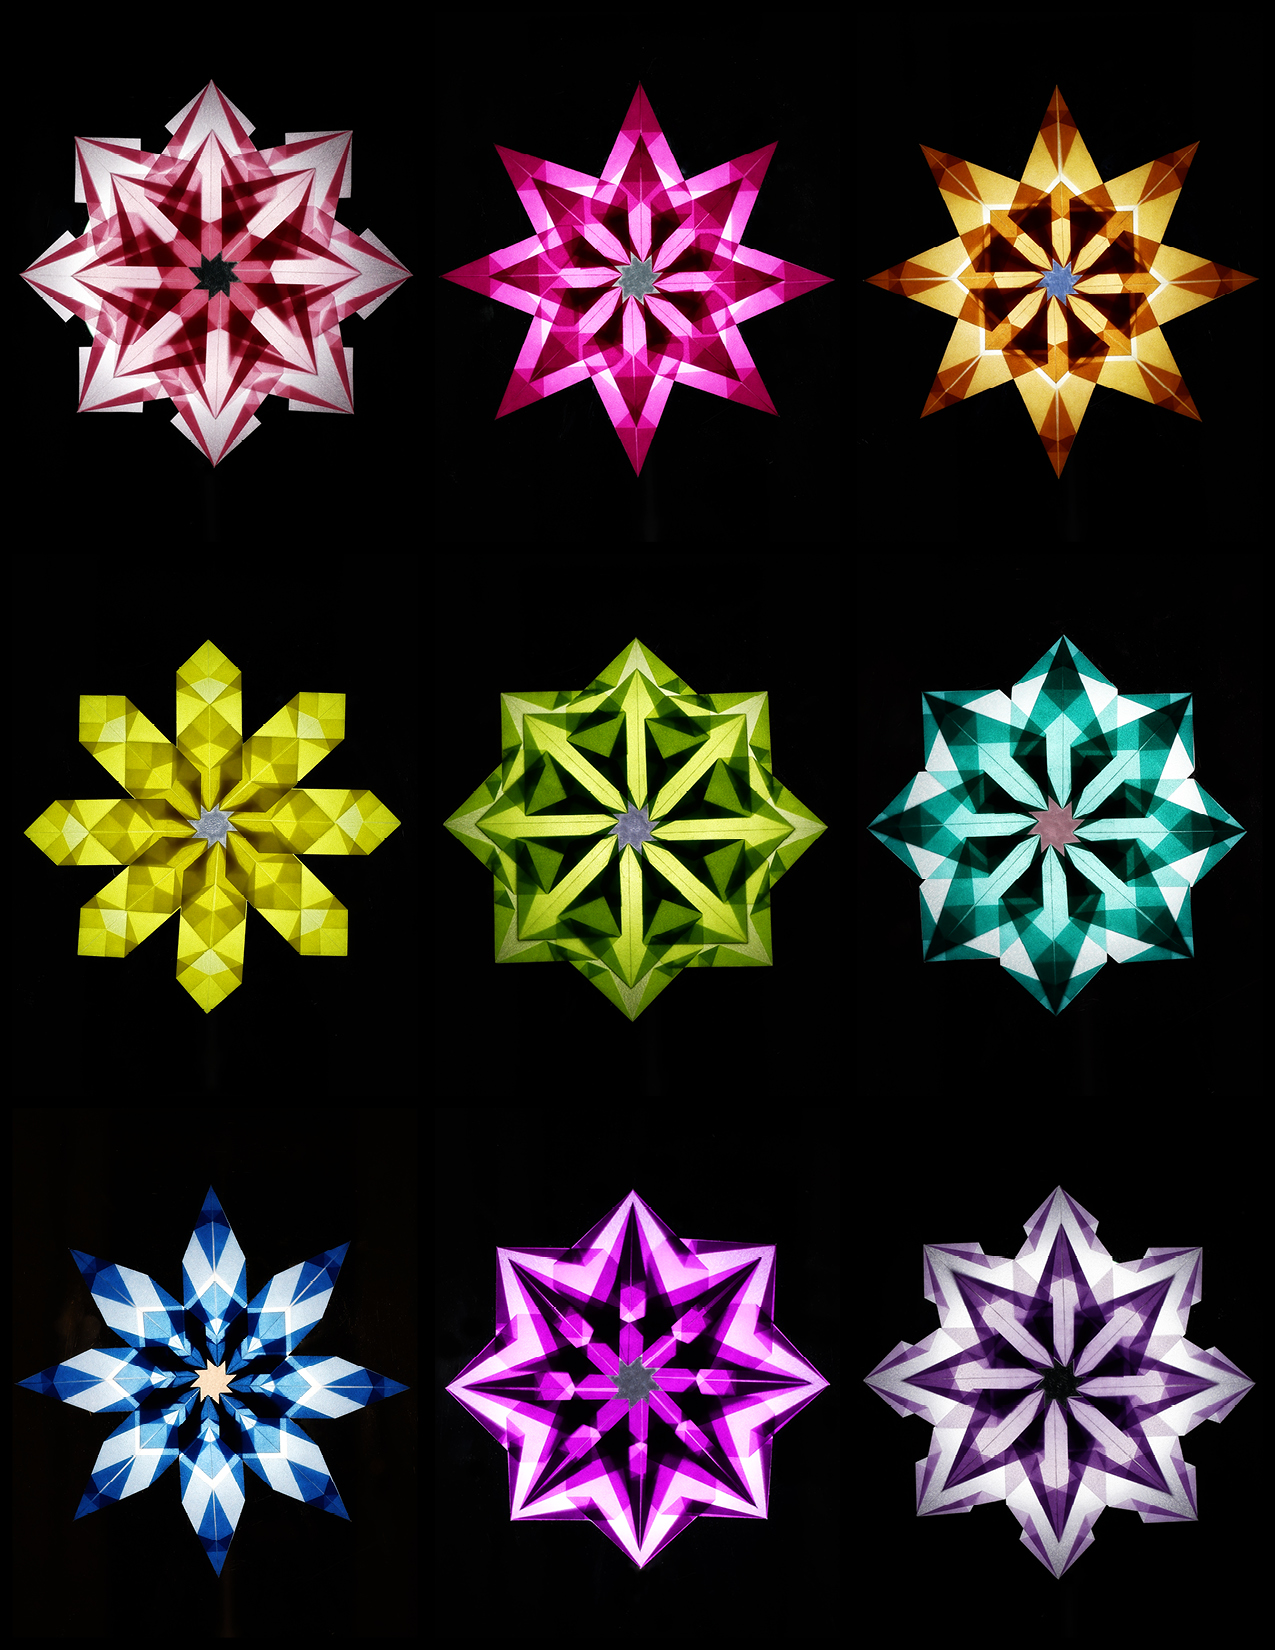
This 130-page e-book shows you everything you need to know to make your own intricate paper stars! It includes a discussion of my favorite materials (and some alternatives if you want to experiment), tips on folding, assembling, and hanging your stars, and fold-by-fold instructions to make 9 different stars (plus ideas for how to make lots of variations of your own).
Skills & scope
I know they look daunting, but if you can fold a piece of paper in half, you can make these!
No really, if you’ve ever made a paper airplane or one of those fortune teller toys you probably played with as a kid, you can absolutely do this. All you ever have to do is fold a piece of paper either straight (like how a card folds before it goes in an envelope) or on a diagonal (like how you can fold a square to make it into a triangle).
Like any new skill, it may feel a tiny bit awkward the first time through, but I’m confident you’ll have the hang of it in no time!
Tools & supplies
One of the best things about the stars is that they need very little in the way of materials! You really just need the right kind of paper, something to fasten the paper together, and a way to hang the finished stars.
Paper
The paper you use for these really matters. It needs to be translucent (so light can shine through it and show off all the layers). It needs to be lightweight (so you can fold it several times without it becoming too thick to work with). And it needs to hold a crisp fold (so your star will have sharp edges and maintain its shape).
I’ve tried a lot of papers, and one stands out as the absolute best choice. It’s called glassine paper (you sometimes see it called kite paper or Waldorf star paper too). It’s translucent, lightweight, and folds beautifully. (Someone always asks, so no, alas tissue paper doesn’t work well at all. It’s floppy and the light doesn’t shine through nicely and it’s a beast to work with.)
You can find packages of 10 or 11 colors of glassine paper on amazon or at some paper or school supply stores. This is the one I buy most often. It’s got 500 sheets of 8 inch square paper. This one is the same stuff just with 100 sheets instead of 500. You can also find it in 6 inch squares in packages of 500 or 100 sheets. It also comes in gigantic sheets (think ‘small poster’) in both multi color and single color packs if you want to make really really big stars.
The only trouble is that colors in those packs are…not my favorite. Even worse, several of them (the blue, purple, brown, and dark green) are so dark that light doesn’t really shine through them very well, so I don’t like using them for stars. There’s a company in Japan that makes the paper in 24 lovely solid colors and 12 gradient colors, but the paper is tricky to find in the US. The best way I’ve found to get it is to put ‘glassine origami paper’ into the search bar on ebay and look through the results. I bought a bunch and I love it! But I realize that it gets expensive to do it that way, so the other stuff might be a better place to start to make sure you like making these first.
All my stars are made with 3-4 sheets of 6 or 8 inch paper.
Fasteners
Each star is made up of several pieces of paper held together in the middle. Because the paper is translucent, you want to be sure that whatever you use to hold the pieces together is also translucent (otherwise you might see it when you hold the star up to the light).
I hold all of my stars together with round, clear stickers. They’re easy to use, nearly invisible and they hold up well over time. All my recent stars are held together with two round, clear stickers (one on the front, one on the back), each two inches in diameter. These are the exact stickers I used, but you can also just search for ’round clear sticker’ if you don’t want to use amazon.
You can also glue your stars together if you have more patience and greater hand-eye coordination than I do. And in a pinch, a circle cut out of clear packing tape will work too.
Hangers
These want to be hung in a sunny window to really shine. I hang mine with adhesive dots (just put one in the very center of the star).
I’ve used these removable ones (great if you want to keep your stars from year to year, but don’t hold quite as firmly as the permanent ones, and you might need more than one for the biggest stars) and these permanent ones (great if you want that star to stay where you put it forever, but you absolutely will destroy your star taking it down, and you’ll have to clean the adhesive off the window), but you can search for either ‘removable adhesive dots’ or ‘permanent adhesive dots’ if you don’t want to use amazon.
I’ve included amazon affiliate links to the exact stuff I use. I fully acknowledge that amazon is evil! But they’re also convenient, especially for things that you probably can’t find locally, and I want to make it easy for you to find what you’re looking for. And if I’m going to send them a sale, I’m ok with them paying me a few cents in return. If you prefer to search for your supplies somewhere else, that’s totally cool, and I included suggestions for what to search for as well.
Mailing List
Want to hear when a new pattern comes out or something fun is going on? Sign up below!
Patreon
Want to support the content I create, get nifty bonus material for some of my favorite patterns, or get every new release delivered right to your inbox? Head over to patreon and sign up!