Supply List
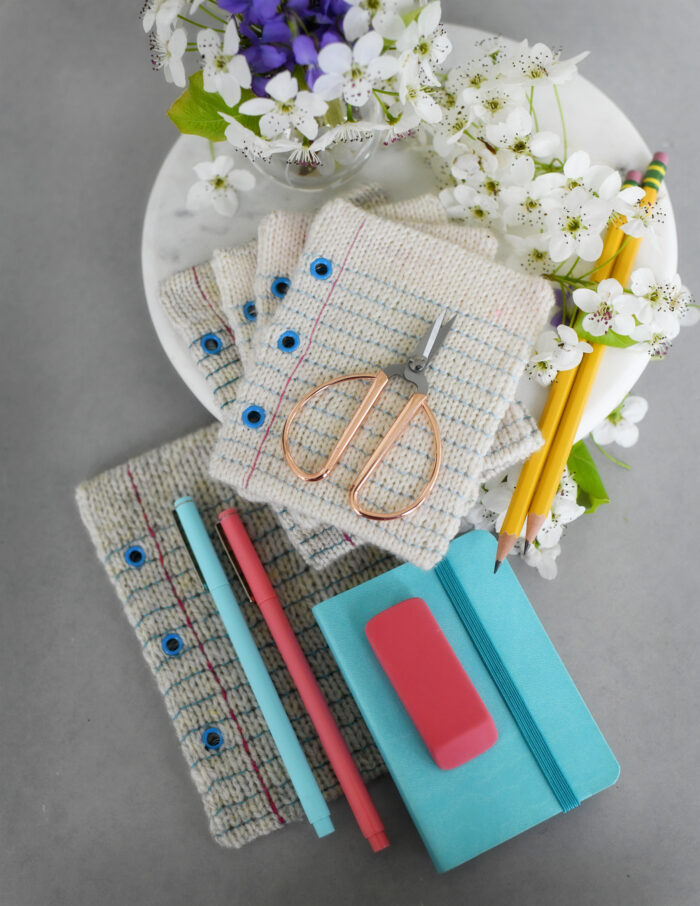
If you, like me, are suddenly overcome with the inexplicable urge to make the world’s most impractical notebook paper, well, I’m here to help! At the very least I can offer moral support and the reassurance that you are not alone in your desires.
I’ll also offer slightly more practical assistance, by which I mean, my printing team is, right this very minute, hard at work on a whole stack of prepunched cards that will out to Notable Nonsense folks in April (barring any exciting disasters in the next two weeks). And for those who want to take a more hands on approach, you can absolutely for sure do this yourself at home. And I’m here to help with that too.
I’m writing up proper instructions (they’ll be out about the same time the prepunched cards go in the mail), and we’ll be doing some videos going over the process over too. And, so you can be ready for when that all comes out, we’ll start those videos today with a supply list (which you can either read or listen to me talk you through, depending on which your brain is up for today, there’s mostly the same stuff in both places). The video is right over here because that’s the easiest place to host video (it may ask you to log in, but everyone with any sort of membership, including the free one, should be able to see it all), the rest is below.
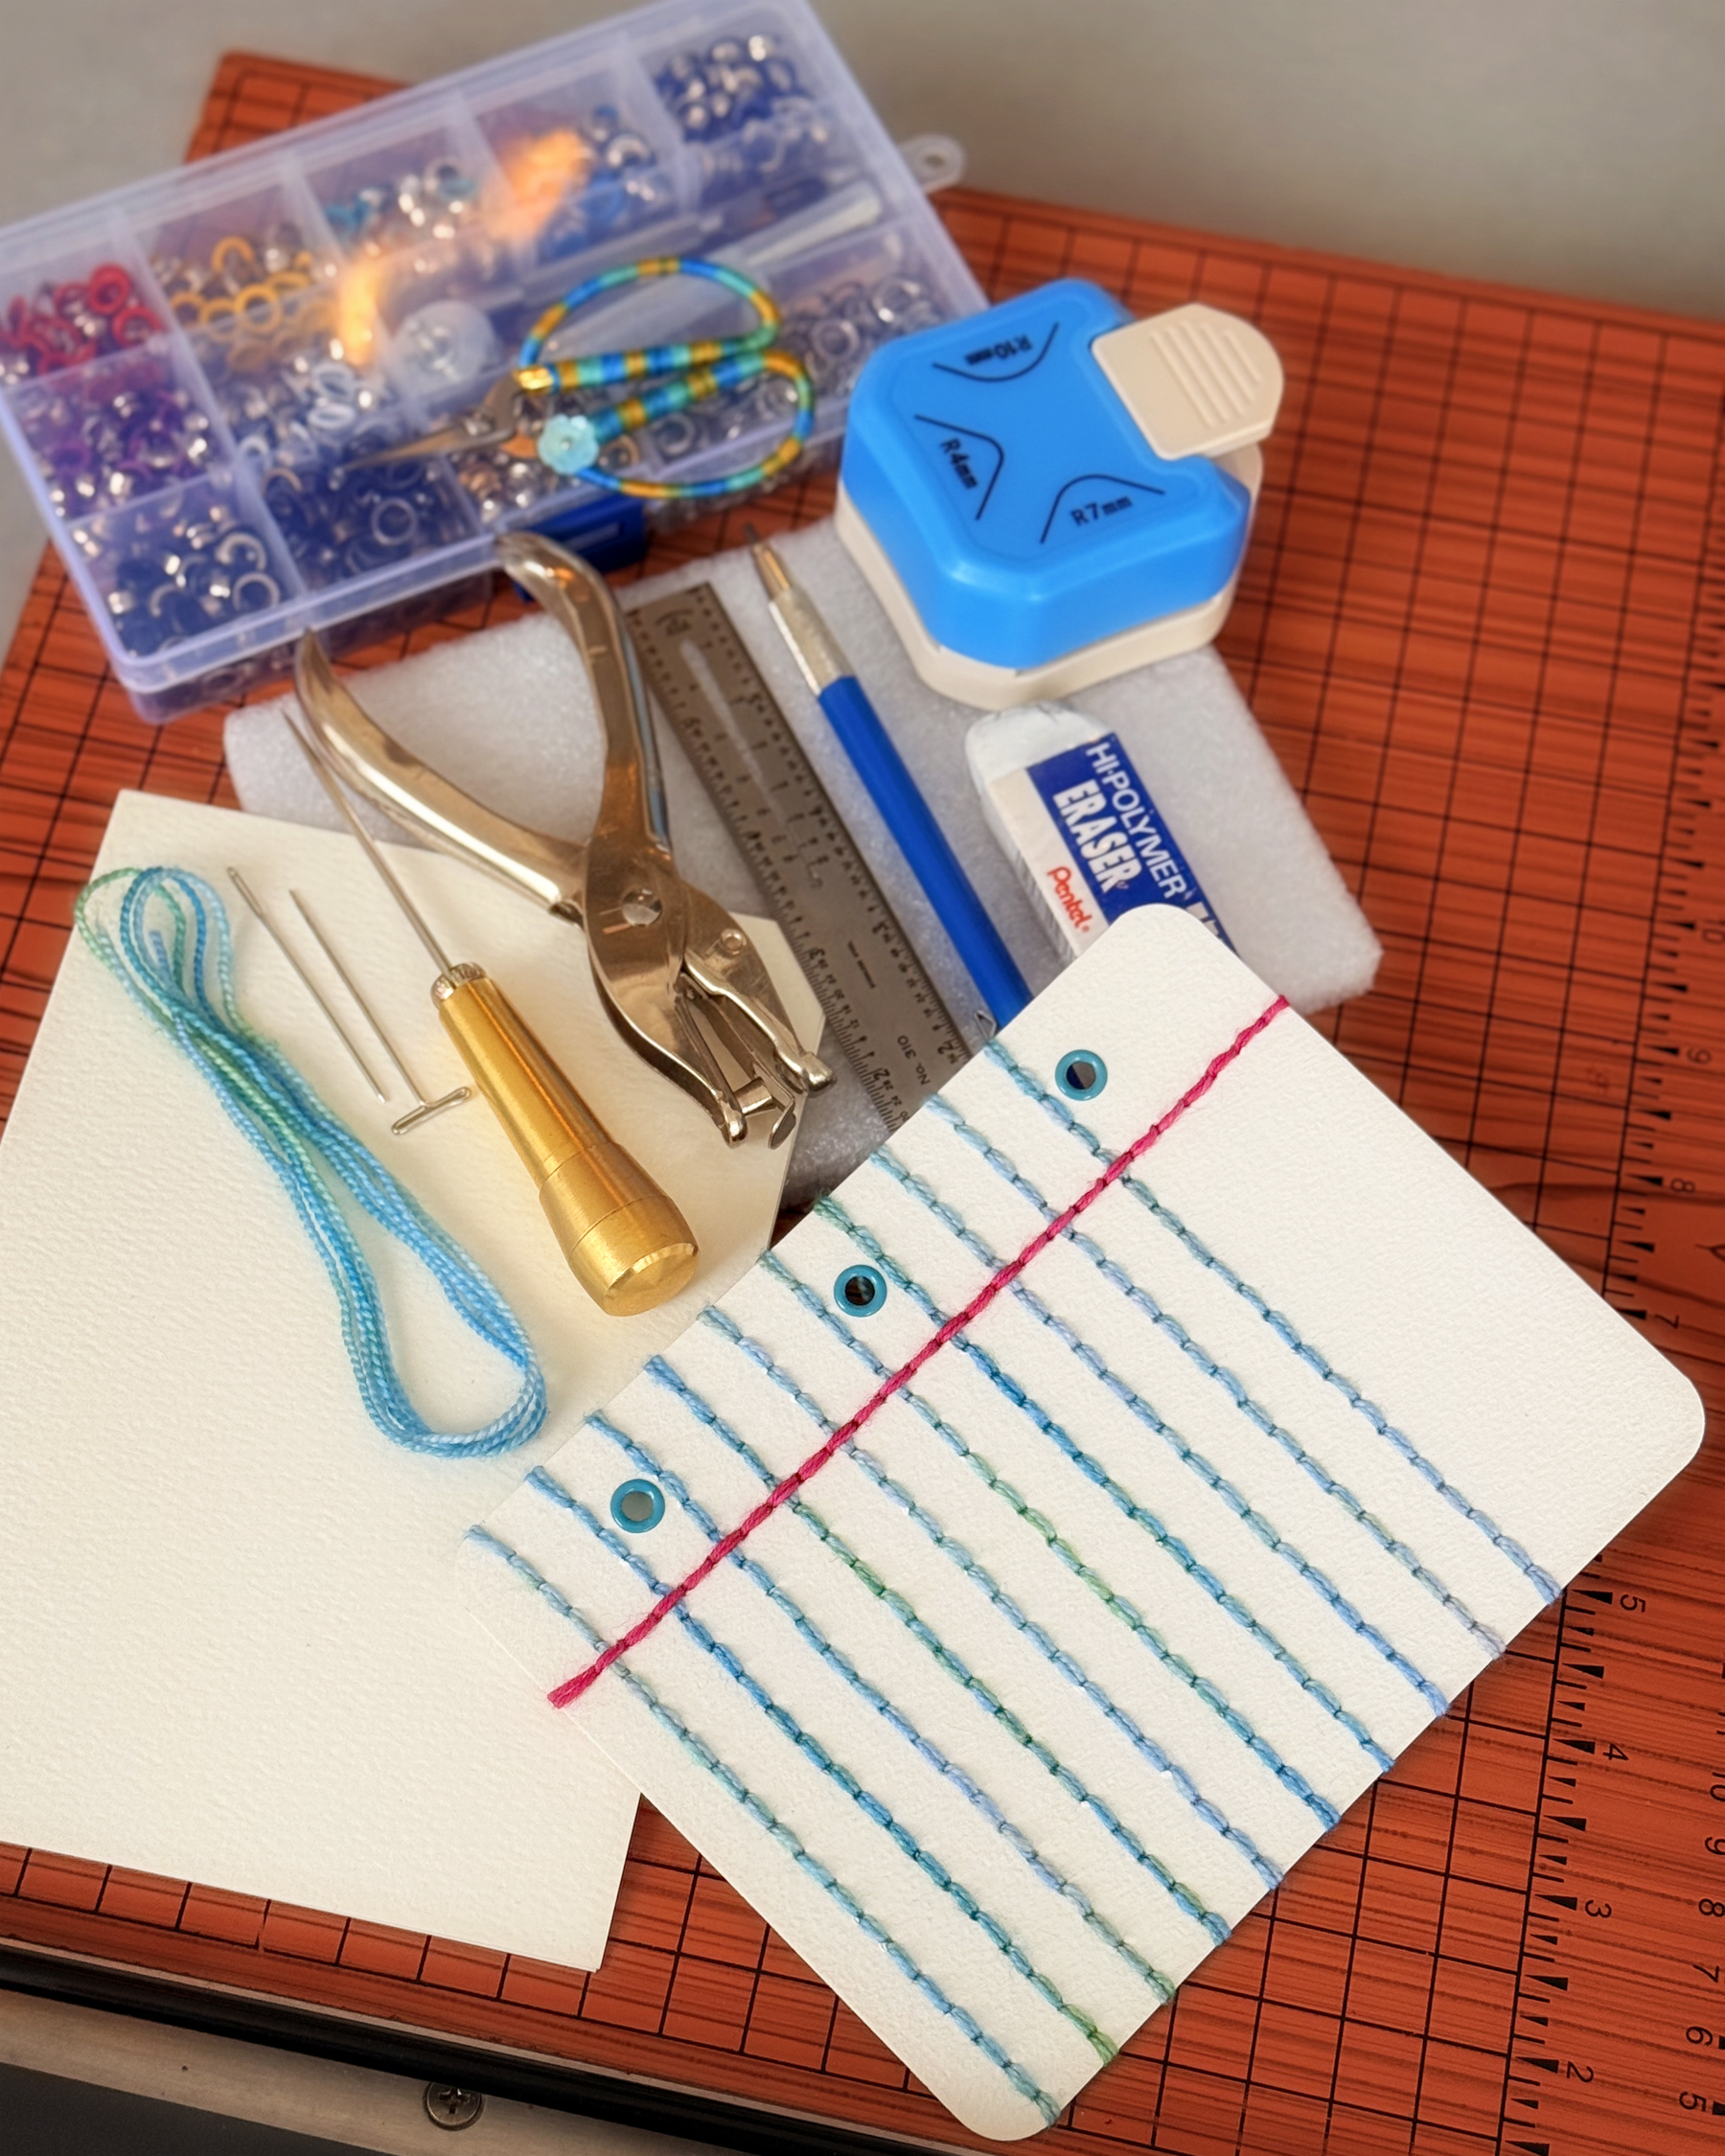
Short version is you need something to embroider on (paper, cardstock, notecard), and something to embroider with (string, yarn, ribbon). The rest is details, and I strongly strongly encourage you to adjust this to work with what’s already lurking in your craft closet/office/recycling bin! No really, if you’re thinking ‘I bet I could do that a slightly different way and achieve the same result,’ you are almost certainly correct, and I encourage you to experiment! That said I know someone out there wants a starting point, so, here’s what I used:*
Paper:
- You want a stiff paper that’s sturdy enough to hold up to your stitching but pliable enough that you can cut/punch it. I used watercolor notecards because I had them on hand in lots of sizes, but most any notecard/light cardstock would work fine. Mine are 4×6, 5×7, 6×9, and 7×10, but you can use what you have (and trim it to size if you want to).
Stuff to bend paper to your will:
- I liked my results best when I cut the paper to the same proportions as actual notebook paper (8.5×11 or a 0.77 width/height aspect ratio). I did that with a paper cutter, though you can absolutely do it with either a utility knife and straight edge or even scissors if you’re more coordinated than I am. You also absolutely do not have to cut your paper to size if you don’t want to, it is, like all of this, totally optional!
- This is my papercutter, yes it is more expensive than some, but I’ve had it for years and am very happy with it and would buy it again, which is more than I can say for the cheap ones I had before.
- I also am a huge sucker for rounded corners, so I used a paper punch to make that happen. It is, once again, optional!
- I have this one, my only complaint is I can’t cut more than two pieces at a time with it.
- I used a ruler and pencil to mark lines, then an awl to punch holes to stitch through, and a hole punch to make the holes on the side. You can improvise on the hole punching for the holes you stitch through. I’ve tried a T-pin, a thumbtack, a small nail, the pointy end of a compass, and a needle (don’t recommend a needle, it’s hard on the fingers). The awl is cheap, sturdy, safer, and more comfortable than a lot of other methods, and it makes nice big holes (which makes the stitching more pleasant). I recommend getting one if you plan to make lots, but if you’re only doing a sheet or two, you can absolutely improvise!
- This is the awl I have, it’s…ok. I got a cheap one for this project and would probably have gotten a better one if I’d known how much I was going to like it because I suspect I’ll be using it in the future, but it works great. I assume you can figure out a regular office supply style hole punch, but if you find yourself planning to buy one, the ones that punch extra far into your paper are super cool. And someone always asks when I show mine, so these are my favorite mechanical pencils (I’ve literally had mine literally since the 90s) and rulers (I liberated mine from my college drafting class, but this is similar), and the one true eraser.
Stuff to stitch with:
- Your imagination is the limit here, this is exactly the sort of project you can make with scraps of other projects. I stitched mine with embroidery floss (the regular cotton stuff, and also wool and silk versions) and several different kinds of yarn (fingering and dk so far). And I have plans to stitch others with ribbon and heavier yarn.
- You’ll also want normal embroidery stuff (blunt needles, scissors) that you almost certainly already have on hand.
If you, like me, are very extra:
- There is absolutely noting stopping you, a grown adult with freewill and a credit card, from adding grommets or binder rings to these. I certainly won’t get in your way.
- I have a stack of leftover grommets from when I did the knitted version of this (and if you ordered those kits from me last year, you probably do too), but if you need them, these are easy to use and come in lots of colors. And I’m not promising a package of binder rings will bring order to your life…but it probably won’t hurt.
Again, you are the boss of your recreational projects and you get to decide how much (if any) of this you want to do! If you don’t want to trim paper to the proportions of notebook paper, don’t! If you don’t want to round the corners, don’t! If you don’t want to add grommets, don’t!
But those are the tools I used to do the bits of this that amused and delighted me, and I welcome you to play with as many of them as will amuse and delight you. Next up, we’ll talk about how to get the paper to the right shape and size and how to riddle it with dozens and dozens and dozens of holes (preferably without adding any holes at all to yourself along the way)!
*World’s most giant ‘amazon is a festering piece of crap with tremendous culpability for many of the things wrong with the world, and if you can find these things somewhere else, you totally totally should’ disclaimer goes here! And also, understand sometimes amazon is what fits in the budget (either the fiscal budget or the time budget) or all that’s available in your area (I say, from my outpost in rural Maine where the nearest big box craft store is a solid 90 minutes from here). So if you need to order them from amazon, and want to make amazon send me a tiny sliver of the money you spend with them, you can use those links and that will happen. Or you can absolutely not use those links and instead search on your own and that’s cool too, I’ll literally never know (and I’ll always encourage you to find stuff elsewhere if that’s accessible to you)!
Mailing List
Want to hear when a new pattern comes out or something fun is going on? Sign up below!
Patreon
Want to support the content I create, get nifty bonus material for some of my favorite patterns, or get every new release delivered right to your inbox? Head over to patreon and sign up!